Category Archives: Walkthrough

Automate discount coupons with Azure Automation and Microsoft Flow

Some background…
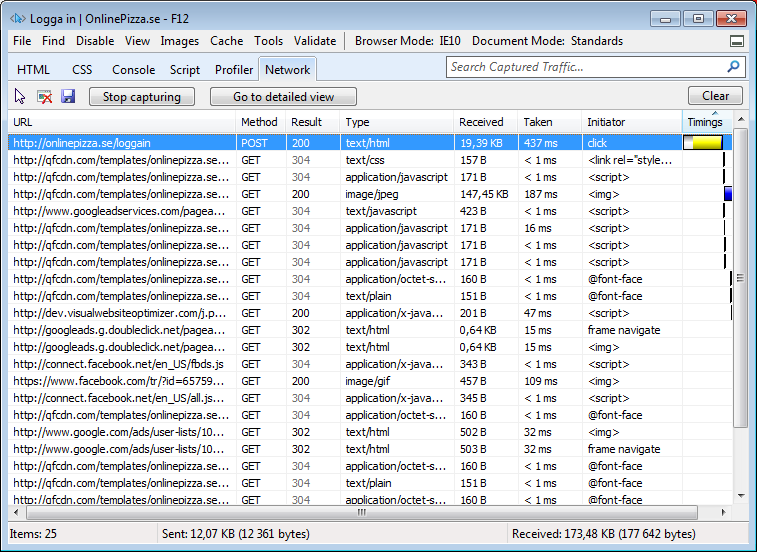
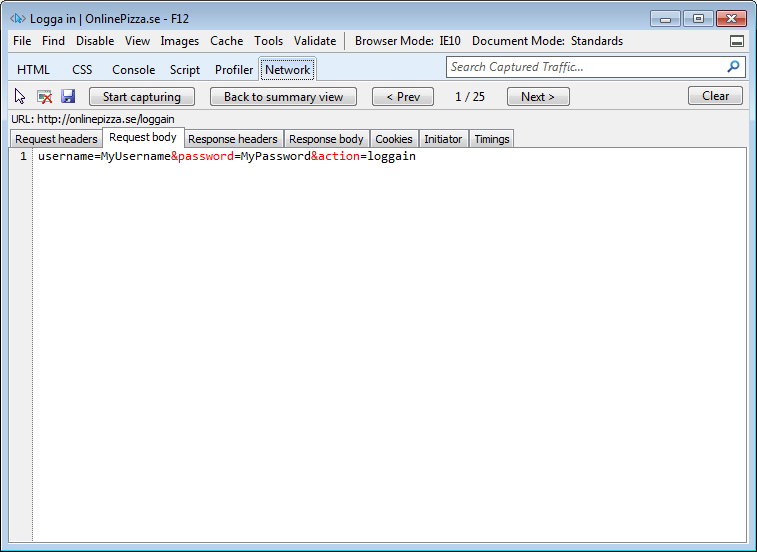
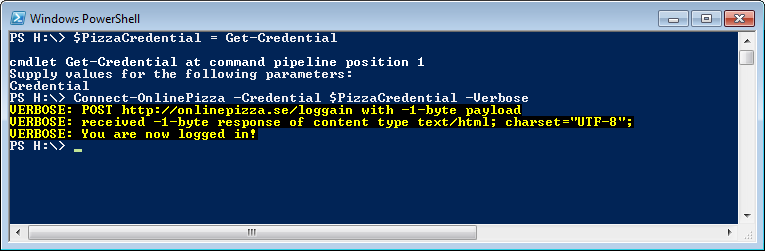
We’ve been buying our groceries online for a few years now. We find it super convenient and it saves us a lot of time. I even created a PowerShell module for it some time ago!

There is one (very minor) annoyance with it though, remembering to use the discount coupons you get after you’ve bought groceries for a certain amount. These coupons or codes get’s sent out before your current order has been delivered which means that you cant add them for your next order (can’t reach checkout while you have an active order waiting for delivery).

This means I have to wait for my order to be delivered and then add to it at the checkout step for my next order, at which point I’ve forgot all about it and maybe even deleted/archived the e-mail containing the pdf-file with the coupon.

I thought of this as the perfect scenario to check out a (relatively) new service from Microsoft called Flow, the idea behind Flow is to make it simple to automate things without the need of writing any code, but that doesn’t mean you can’t do that as well 🙂

How to achieve this?
When building automation I usually try to write down the steps needed to achieve the “end-to-end automation”. In this case that would be:

  1. Make sure the e-mails containing the coupons can be found automatically
  2. Get the coupon from the e-mail moved somewhere where it can be accessed by a PowerShell runbook in Azure Automation
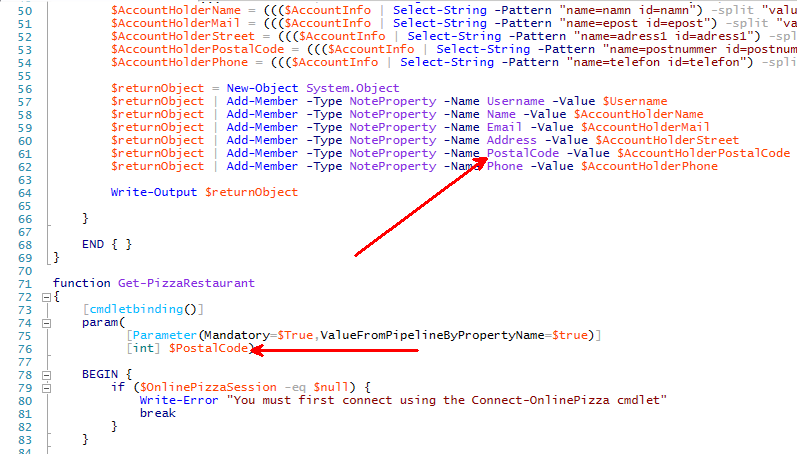
  3. Create a PowerShell function that can parse pdf-files so the code inside can be retrieved
  4. Create another PowerShell function that can post the code to the online grocery store
  5. Profit! 🙂

These steps have now been achieved, and here’s how I did it:

Fetching the E-mail and the attachments (Step 1 and 2)
This is amazingly simple using Microsoft Flow. After you’ve signed up and logged in, just go to “My Flows” and click “Create from template”. There are quite a few to pick from so the easiest way to achieve this is to use the search function at the top of page, since I’m using Outlook.com as my personal e-mail provider, and thought the simplest way to store the attachments was using blob storage, I simply searched for “outlook blob” and found these templates I could use:

serachforoutlookblob

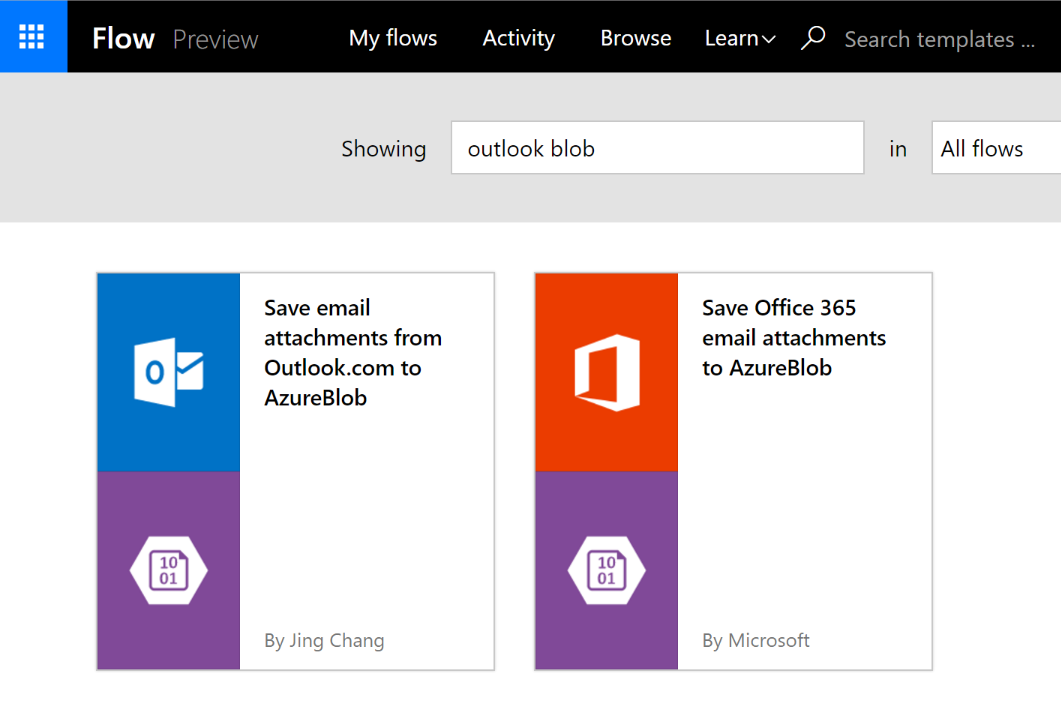
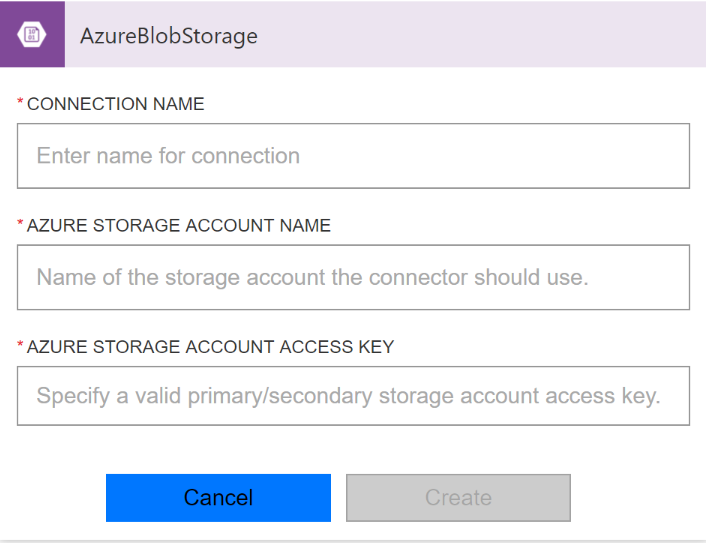
In my case, the first one fits perfectly so that’s the one I chose as a starting point. Click on it, pick “choose this template” and first connect your Azure storage account (needs to be created in advance):

connectazurestorage

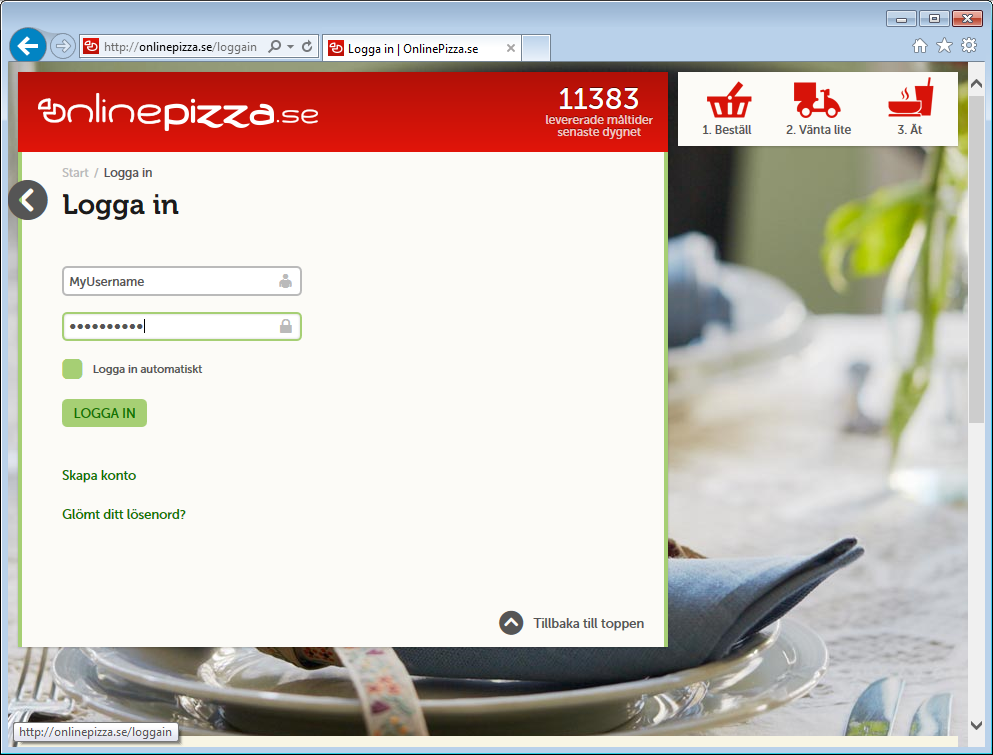
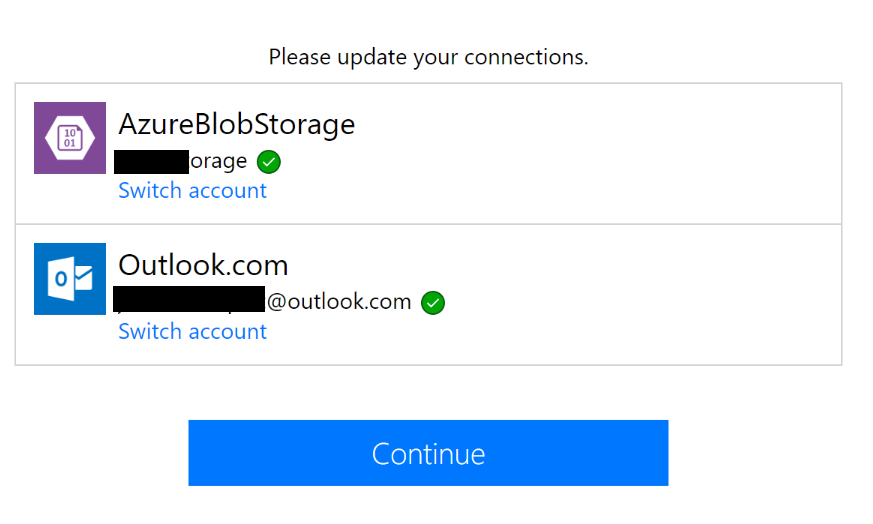
Then connect your e-mail account by logging in:

connectoutlookaccount

If everything worked, you can go on and press “Continue”


connectedaccounts

You’ll then arrive at the page where you can configure the different steps in your flow, and if you want to, add some conditions. After you’ve clicked “edit” on both steps and updated them they should look something like this:
floweditmodeupdated

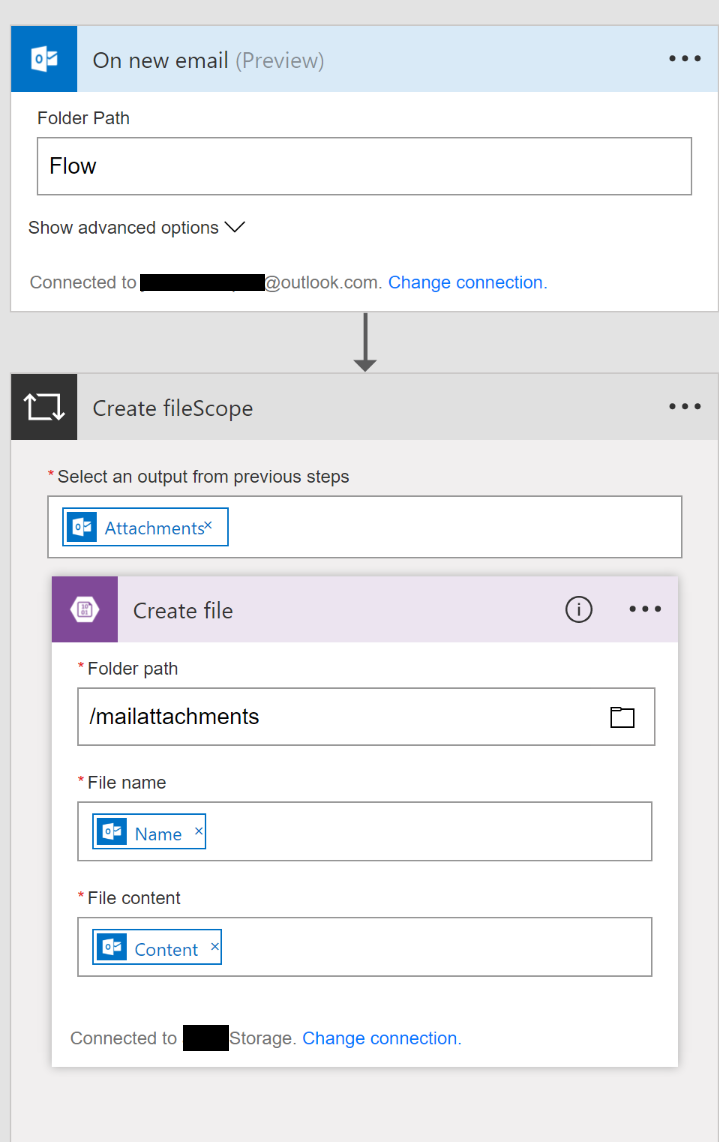
As you can see, I changed the folder this flow should look in from “Inbox” to “Flow” to prevent it from harvesting all the attachments I receive. I can then simply add a mail rule to put the e-mails I want in that folder.

Same thing for the “Create file”-step, “mailattachments” should correspond to a container on your storage account.

That’s it for parsing the e-mails. If you would like to, you could also add a http request after these steps to trigger the runbook automatically (webhook) as soon as a new attachment has been saved to the blob storage, but in this case, I’ll just schedule that to run at a regular intervall.

Parsing the pdf-file and posting the discount code (step 3, 4 and 5!)
To be able to get text out of the pdf-file I used the iTextSharp library. Then wrap that up in a PowerShell function, which in it’s simplest form might look something like this:

(Code example found at: https://powershell.org/forums/topic/convertfrom-pdf-powershell-cmdlet/)

Add-Type -Path "$PSScriptRoot\itextsharp.dll"

function Get-PdfText
{
    [CmdletBinding()]
    [OutputType([string])]
    param (
        [Parameter(Mandatory = $true)]
        [string]
        $Path
    )

    $Path = $PSCmdlet.GetUnresolvedProviderPathFromPSPath($Path)

    try
    {
        $reader = New-Object iTextSharp.text.pdf.pdfreader -ArgumentList $Path
    }
    catch
    {
        throw
    }

    $stringBuilder = New-Object System.Text.StringBuilder

    for ($page = 1; $page -le $reader.NumberOfPages; $page++)
    {
        $text = [iTextSharp.text.pdf.parser.PdfTextExtractor]::GetTextFromPage($reader, $page)
        $null = $stringBuilder.AppendLine($text) 
    }

    $reader.Close()

    return $stringBuilder.ToString()
}

I’ve also added a function called “Add-MatHemBonusCode” to my “Grocery shopping PowerShell module“, because that got to exist, right? 😉

Finally, it’s time to wrap those functions up in a runbook.

The runbook could look something like this (dont look at this as a runbook best practice template, it’s not 🙂 ):

# Load the credentials needed
$AzureCredential = Get-AutomationPSCredential -Name 'AzureCred'
$MatHemCredential = Get-AutomationPSCredential -Name 'MatHem'

# Log into to Azure
Add-AzureRmAccount -Credential $AzureCredential

# Set a few parameters and fetch the storage information
$ResourceGroupName = 'MyResourceGroup'
$StorageAccountName = 'MyStorageAccount'
$ContainerName = 'mailattachments'
$StorageAccountKey = Get-AzureRmStorageAccountKey -ResourceGroupName $ResourceGroupName -Name $StorageAccountName

$StorageContext = New-AzureStorageContext -StorageAccountName $StorageAccountName -StorageAccountKey $StorageAccountKey[0].Value

$Blobs = Get-AzureStorageBlob -Context $StorageContext -Container $ContainerName

# Filter out the attachment needed for this specific flow, only
# needed if you run multiple flows that look at attachments in the
# same container
$TargetedBlobs = $Blobs | Where-Object { $_.Name -match '^kvitto|^bonus' }

foreach ($MatHemBlob in $TargetedBlobs) {

    if ($MatHemBlob.Name -match '^kvitto') {
        # These are not needed so let's just remove them
        Remove-AzureStorageBlob -Blob $MatHemBlob.Name -Context $StorageContext -Container $ContainerName -Force
    }
    elseif ($MatHemBlob.Name -match '^bonus') {
        # These contain the actual bonus or discount codes, so lets download those
        $LocalFileName = [System.IO.Path]::GetTempFileName()
        Get-AzureStorageBlobContent -Blob $MatHemBlob.Name -Container $ContainerName -Context $StorageContext -Destination $LocalFileName -Force

        # Fetch the text from the file
        $BonusPdfText = (Get-PdfText -Path $LocalFileName) -split "`n"

        # parse out the code itself
        $BonusCode = ((($BonusPdfText -match '^Värdekod:') -split 'Värdekod: ')[1]).trim()

        # Connect to the online grocery store and post the code (+some error handling and notifications)
        if (-not $Global:MathemSession) {
            Connect-Mathem -Credential $MatHemCredential
        }

        if ($BonusCode) {
            try {
                $Results = Add-MatHemBonusCode -BonusCode $BonusCode -ErrorAction Stop
            }
            catch {
                if ($_.ToString() -like '*Bonuskoden har redan använts i en annan order*' ) {
                    Write-Warning "Bonus code $BonusCode have already been used. Cleaning up blob..."
                    Send-PushNotification -Message "Bonus code $BonusCode from $($MatHemBlob.Name) have already been used. I'm cleaning up the blob."
                    Remove-AzureStorageBlob -Blob $MatHemBlob.Name -Context $StorageContext -Container $ContainerName -Force
                    Continue
                }
                elseif ($_.ToString() -like '*Felaktig bonuskod*' ) {
                    Write-Warning "Bonus code $BonusCode is invalid. Notifying master..."
                    Send-PushNotification -Message "The bonus code $BonusCode from $($MatHemBlob.Name) was invalid. Please take care of this for me!"
                    Remove-AzureStorageBlob -Blob $MatHemBlob.Name -Context $StorageContext -Container $ContainerName -Force
                    Continue
                }
                else {
                    Write-Warning "Failed to add bonus code $BonusCode from $($MatHemBlob.Name). The error was $($_.ToString())"
                    Send-PushNotification -Message "Failed to add bonus code $BonusCode from $($MatHemBlob.Name). The error was: $($_.ToString())"
                    Continue
                }
            }

            Send-PushNotification -Message "Bonus code $BonusCode from $($MatHemBlob.Name) have been added with the response: $Results"
        }
    }
}

Time to schedule that in Azure Automation, and make sure all the modules needed are available for it when it runs! (I run this on a hybrid worker)

Conclusion
While I have had a few issues with Microsoft Flow along the way (it is still in preview after all), it seems like a really cool service. And since you can make a http request to a webhook in Azure Automation, and/or just integrate them through some other service like the blob storage example in this post, the possibilities are pretty much endless.

So, as always… Keep automating anything!

Ordering pizza with PowerShell (web scraping guide) – Part 2

So, we have created our Connect-OnlinePizza function and now have access to parts of the site that are only available when logged in. But how?

Remember the Invoke-WebRequest-cmdlet in the last post?
We specified a session variable in the Global scope, and that variable contains cookies and data to keep our session with the site consistent over multiple webrequests, and that’s what we’ll use in our next function, Get-MyOnlinePizzaAccountInfo.

Get-MyOnlinePizzaAccountInfo
First of all, we need to find what page holds the information we want. In this case, the page containing the account information was located at http://onlinepizza.se/?view=andraKonto (it requires you to be logged in).

Make sure you ran the “Connect-OnlinePizza”-function first, that way the “$OnlinePizzaSession”-variable will be available and make it possible for us to reach this page and see the details of our account.

To fetch the page and load it into a variable you could do this (we save it to file because of the issue with the encoding name, see part 1 of this guide):

Invoke-WebRequest -Uri "http://onlinepizza.se/?view=andraKonto" -Method Get -WebSession $Global:OnlinePizzaSession -OutFile .\dump.htm
$AccountInfo = Get-Content .\dump.htm -Encoding UTF8

If this worked, we should start looking in the “dump.htm”-file for where the name is, use Select-String or just open the file in notepad and search for it.

When you’ve found the line, you need to figure out how to trim away all the parts of the line that you don’t want. In my case, it looks like this:

<input type=text name=namn id=namn class="input-medium" maxlength=100 value="Anders Wahlqvist"/>

I’m by no means an expert in string manipulation or regex, so there is probably a better way of doing this, but I usually use the Split-operator to get the part I want. In this case we need to split the string after value=” and before “/> (or remove it). We also need to fetch this particular line from the sites html code.

Take a look at this line:

$AccountHolderName = ((($AccountInfo | Select-String -Pattern "name=namn id=namn") -split "value=`"")[1] -split "`"/>")[0]

That might look like a complete mess, but we’ll break it down! We first need to fetch the correct line that contains the name which we can do with:

$AccountInfo | Select-String -Pattern "name=namn id=namn"

We want to do the “splitting” on the results of that, and therefore we need to put parentheses around that command before we add the “-split” operator. So let’s split that up and see what happens:

PS> ($AccountInfo | Select-String -Pattern "name=namn id=namn") -split "value=`""
input type=text name=namn id=namn class="input-medium" maxlength=100 
Anders Wahlqvist"/>

As you can see, we get two tokens back, and we need the second one. This can easily be done by putting everything in another pair of parentheses and then just specify which one we want. Since the first one will be identified as 0, and the one we want 1, we will end up with this:

PS> (($AccountInfo | Select-String -Pattern "name=namn id=namn") -split "value=`"")[1]
Anders Wahlqvist"/>

To get rid of that last part, we could either use the "replace"-operator or do another split. In this case, the "replace"-operator might be the better choice, but in my experience the split-operator will provide a more robust and consistent result. The site might change and add something else after "/> on the same line, or there might be some white space that you didn't see, so let's just do another split, wrap that up in a new set of parentheses and
and select token 0 (first one), which will get us our original line:

$AccountHolderName = ((($AccountInfo | Select-String -Pattern "name=namn id=namn") -split "value=`"")[1] -split "`"/>")[0]

Hopefully this line doesn't seem as messy anymore 🙂

Now we repeat that for all the information we want, like this:

$Username = ((($AccountInfo | Select-String -Pattern "name=username id=username") -split "value=`"")[1] -split "`" />")[0]
$AccountHolderName = ((($AccountInfo | Select-String -Pattern "name=namn id=namn") -split "value=`"")[1] -split "`"/>")[0]
$AccountHolderMail = ((($AccountInfo | Select-String -Pattern "name=epost id=epost") -split "value=`"")[1] -split "`"/>")[0]
$AccountHolderStreet = ((($AccountInfo | Select-String -Pattern "name=adress1 id=adress1") -split "value=`"")[1] -split "`"/>")[0]
$AccountHolderPostalCode = ((($AccountInfo | Select-String -Pattern "name=postnummer id=postnummer") -split "value=`"")[1] -split "`"/>")[0]
$AccountHolderPhone = ((($AccountInfo | Select-String -Pattern "name=telefon id=telefon") -split "value=`"")[1] -split "`"/>")[0]

And finally, we create an object for it and send it to the pipeline:

$returnObject = New-Object System.Object
$returnObject | Add-Member -Type NoteProperty -Name Username -Value $Username
$returnObject | Add-Member -Type NoteProperty -Name Name -Value $AccountHolderName
$returnObject | Add-Member -Type NoteProperty -Name Email -Value $AccountHolderMail
$returnObject | Add-Member -Type NoteProperty -Name Address -Value $AccountHolderStreet
$returnObject | Add-Member -Type NoteProperty -Name PostalCode -Value $AccountHolderPostalCode
$returnObject | Add-Member -Type NoteProperty -Name Phone -Value $AccountHolderPhone

Write-Output $returnObject

So far so good, time to wrap this up in a function, we've already looked at that in the last post, so I'll just add the complete code here:

function Get-MyOnlinePizzaAccountInfo
{
    [cmdletbinding()]
    param()

    BEGIN {
        if ($OnlinePizzaSession -eq $null) {
            Write-Error "You must first connect using the Connect-OnlinePizza cmdlet"
            break
        }
    }

    PROCESS {

        Invoke-WebRequest -Uri "http://onlinepizza.se/?view=andraKonto" -Method Get -WebSession $Global:OnlinePizzaSession -OutFile .\dump.htm

        $AccountInfo = Get-Content .\dump.htm -Encoding UTF8

        Remove-Item .\dump.htm -Force -Confirm:$false -ErrorAction SilentlyContinue

        $Username = ((($AccountInfo | Select-String -Pattern "name=username id=username") -split "value=`"")[1] -split "`" />")[0]
        $AccountHolderName = ((($AccountInfo | Select-String -Pattern "name=namn id=namn") -split "value=`"")[1] -split "`"/>")[0]
        $AccountHolderMail = ((($AccountInfo | Select-String -Pattern "name=epost id=epost") -split "value=`"")[1] -split "`"/>")[0]
        $AccountHolderStreet = ((($AccountInfo | Select-String -Pattern "name=adress1 id=adress1") -split "value=`"")[1] -split "`"/>")[0]
        $AccountHolderPostalCode = ((($AccountInfo | Select-String -Pattern "name=postnummer id=postnummer") -split "value=`"")[1] -split "`"/>")[0]
        $AccountHolderPhone = ((($AccountInfo | Select-String -Pattern "name=telefon id=telefon") -split "value=`"")[1] -split "`"/>")[0]

        $returnObject = New-Object System.Object
        $returnObject | Add-Member -Type NoteProperty -Name Username -Value $Username
        $returnObject | Add-Member -Type NoteProperty -Name Name -Value $AccountHolderName
        $returnObject | Add-Member -Type NoteProperty -Name Email -Value $AccountHolderMail
        $returnObject | Add-Member -Type NoteProperty -Name Address -Value $AccountHolderStreet
        $returnObject | Add-Member -Type NoteProperty -Name PostalCode -Value $AccountHolderPostalCode
        $returnObject | Add-Member -Type NoteProperty -Name Phone -Value $AccountHolderPhone

        Write-Output $returnObject

    }

    END { }
}

Take a look at line 7 through 10, here we check if there is a variable called "$OnlinePizzaSession" available, if not, the user running this function probably didn't run the "Connect-OnlinePizza"-function, and this function won't work. Therefor, we write an error and exit the function. This is a pretty good method to ensure that the functions are used correctly.

So, finally time for our last function!

Get-PizzaRestaurant
Most parts of this function will be created more or less in the exact same way as the last one, so I'll just go through the differences.

First of all, we want these cmdlets to work together in a good way to give them that "module"-feeling 🙂

One way of doing that is to add pipeline support, but how?

Well, this function will return a list of restaurants based on our location, and the location is based on our postal code (zip code). If you check our last function we actually return a property value called "PostalCode" which would be perfect for pipelining, and it's really easy to do!

All we need is "ValueFromPipelineByPropertyName=$true" when declaring the parameter, like this:

    param(
          [Parameter(Mandatory=$True,ValueFromPipelineByPropertyName=$true)]
          [int] $PostalCode)

And we need to verify that the property in object we output match the parameter name:
pipeline_pizza

Also, as you can see, we are declaring the parameter data type as an int, this way, no one will give as a postal code with spaces in it. If we want to, we could also validate that it really is a postal code, but again, this guide is not as much about writing advanced functions in general but has more to do with web scraping, so we'll just let it be.

Let's look at the rest of this function:

function Get-PizzaRestaurant
{
    [cmdletbinding()]
    param(
          [Parameter(Mandatory=$True,ValueFromPipelineByPropertyName=$true)]
          [int] $PostalCode)

    BEGIN {
        if ($OnlinePizzaSession -eq $null) {
            Write-Error "You must first connect using the Connect-OnlinePizza cmdlet"
            break
        }
    }

    PROCESS {

        Invoke-WebRequest -Uri "http://onlinepizza.se/postnummer/$PostalCode" -Method Get -WebSession $Global:OnlinePizzaSession -OutFile .\dump.htm

        $ResturantList = ((Get-Content .\dump.htm) -join "`n") -split "<UL>" | select -Skip 1

        Remove-Item .\dump.htm -Force -Confirm:$false -ErrorAction SilentlyContinue

        foreach ($Restaurant in $ResturantList) {

            $RestaurantName = (($Restaurant -split "<h4>")[1] -split "</h4>")[0]

            if ($RestaurantName -eq '') {
                Continue
            }

            $RestaurantStreet = (($Restaurant -split "<address>")[1] -split "</address>")[0]
            $OpeningHoursDelivery = ((($Restaurant -split "Utkörning:</strong><br />")[1] -split "<br />")[0]).Trim()
            $OpeningHoursTakeAway = ((($Restaurant -split "Avhämtning:</strong><br />")[1] -split "<br />")[0]).Trim()
            $RestaurantLink = ((($Restaurant -split "meny")[0] -split "href=`"")[1] -split "`"")[0]

            $returnObject = New-Object System.Object
            $returnObject | Add-Member -Type NoteProperty -Name RestaurantName -Value $RestaurantName
            $returnObject | Add-Member -Type NoteProperty -Name RestaurantStreet -Value $RestaurantStreet
            $returnObject | Add-Member -Type NoteProperty -Name OpeningHoursDelivery -Value $OpeningHoursDelivery
            $returnObject | Add-Member -Type NoteProperty -Name OpeningHoursTakeAway -Value $OpeningHoursTakeAway
            $returnObject | Add-Member -Type NoteProperty -Name RestaurantLink -Value $RestaurantLink

            Write-Output $returnObject

            Remove-Variable RestaurantName, RestaurantStreet, OpeningHoursDelivery, OpeningHoursTakeAway, RestaurantLink -ErrorAction SilentlyContinue
        }
    }

    END { }
}

A few more comments might be needed here, if you look at line 19, we use the opposite of split, the join-operator. Why? Well, when looking at the html-code of the site the information is spanning over multiple lines, by joining on linefeeds (`n = linefeed) we can get all the information for each restaurant as "one part" instead of multiple lines, which helps a lot!

Also, at line 32 and 33, we call a method called Trim(), this method removes all leading and trailing white-space characters from the string we're working on.

Finally, at line 45 we remove all the variables to prevent them from being "reused" on the next iteration of the loop if the next restaurants data is different or missing. Clear-Variable would work perfectly here aswell.

And that's it!

Result
We have now created functions to connect to a site, utilize functions that are only available when logged in and we have also made the functions work together in a nice way.

This is how they look in action:
finally

Pretty neat, huh? 🙂

The code for all of these functions have been uploaded here.

I hope you enjoyed this little guide, and if you have any questions, feel free to ask them in the comments or drop me an e-mail!

And keep automating anything 🙂

Ordering pizza with PowerShell (web scraping guide) – Part 1

Since I’ve gotten some positive feedback regarding the web scrape related posts on this blog, I thought I should write a guide on how to build PowerShell functions that interacts with a website. To make it a bit more fun, I thought it should be about ordering pizza!

The site in question is a Swedish site called OnlinePizza.

Since the actual code won’t be used for anything serious, you will see a few shortcuts here and there, the goal is to give you an idea on how to do something similar, not to create the perfect pizza automation module. In fact, we’ll only create a few functions, one for logging in, one for checking our account information and one for listing restaurants. Hopefully, the process and steps we will go through when creating these functions will teach you the basics of web scraping. To create a whole module that can handle the complete process of ordering pizzas seems a bit overkill, but feel free to keep working on it if you want to 🙂

So with no further ado, let’s get to it…

Figuring out how the site works and logging in
The first thing we need to do is figuring out how to log in. The easiest way to do this is to open a web browser with some developer features, since I’ve used Chrome before I thought I could use Internet Explorer in this example.

Begin with locating the loginpage for the site, which in this example is: http://onlinepizza.se/loggain as shown below:
press_login
After you’ve browsed to that page and filled in your username/password, you press F12 (Ctrl+Shift+i if you’re using Chrome) and select the “Network”-tab and press the “Start capturing”-button.

Should look something like this if using IE:
network_capture_started

Go back to the site and press the “login” button (“Logga in” in Swedish), and when it’s done, go back to the “network”-tab again and check the first request which is usually a Get or a Post request, in this case a Post-request:
login_pressed

Double click on the first row and select the “Request body”-tab. This is how the webrequest looked when it got sent to the webserver, so this is what we need to mimic from PowerShell:

login_post

This can be done in different ways, you could either basically download the site, try to manipulate the fields and then post the form, or create a hashtable with the required keys (username, password and action) and send that. The later is quickest since it only needs one request, so that’s what we’ll do here (this might not always work though).

To create the hashtable you can do this:

$Request = @{'username' = 'MyUsername'
             'password'= 'MyPassword'
             'action'= 'loggain'}

We now need to send it to the web server. The easiest way to do this is usually to use the “Invoke-WebRequest”-cmdlet that came with PowerShell v3, so that’s what we’ll do here. There are a few scenarios where this will give you issues, as is the case with this site, so we’ll need to use a workaround. When trying to download the site with the “Invoke-WebRequest”-cmdlet it will give you the error: “Invoke-WebRequest : ‘”UTF-8″‘ is not a supported encoding name.”

This leaves you two options as far as I know, you either skip the “Invoke-WebRequest”-cmdlet altogether and use the .Net WebClient Class instead, or you can fix this error by sending the output of the cmdlet to a file instead of the pipeline. We’ll do the latter here and save the .Net-method for another post.

Note: As stated above, this is mostly to give you and idea on how to create a “web scraping function” in PowerShell so we’ll do a few shortcuts. If this was a to become a serious module that would later be used in production, make sure the output-file is written to a place where the user will have write access and that it has a name that won’t damage (overwrite) anything.

The command itself is pretty simple, it looks like this:

Invoke-WebRequest -Uri "https://onlinepizza.se/loggain" -Method Post -Body $Request -SessionVariable Global:OnlinePizzaSession -OutFile .\dump.htm

I’ll break it down a bit so you’ll know what each parameter does:

  1. Uri – This specifies where to send the request. This should be the URL you saw in the screenshot of the “Request body” above, this can differ from the actual loginpage depending on the site.
  2. Method – This should match the method you saw in the loginrequest, in this case it was a “Post”-request.
  3. Body – This is what the request will actually contain, in our case the hashtable we created.
  4. SessionVariable – The variable we specify here (no leading $!) will contain cookies and other data needed to keep the session consistent through the rest of the commands we will run (this will for example keep us logged in). I’ve specified it in the “Global” scope since we want to use it together with other functions later on, and to make that work, it can’t be in the functions scope (since that will be gone before the next function will execute).
  5. OutFile – Our workaround. Specify a file where the output from the command (the html of the site) should be saved.

Alright, so the request is sent and we should now be logged in, you can verify this by looking in the “dump.htm”-file, it will usually contain a “You have been logged in!”-message of some sort. In this case that message is in Swedish though.

So, we have figured out how to log in, we now need to wrap a function around this, which will be our next step in this process!

Creating the function
To create this function we need to ask for a parameter, the only one we need in this case is the credential, which should be of the type PSCredential.

The code for defining the function name and the parameter looks like this:

function Connect-OnlinePizza
{
    [cmdletbinding()]
    param(
          [Parameter(Mandatory=$True)]
          [System.Management.Automation.PSCredential] $Credential)

As you can see, we also add the almost magical “cmdletbinding”-keyword aswell to get all the wonderful features that gives us. We also state the Credential-parameter as mandatory, and we define its data type, which will make the function ask for the credential in the same way as “Get-Credential” works if the user didn’t specify any.

We now need to place the credential in our request, which we can do this way:

$Username = $Credential.UserName
$Password = $Credential.GetNetworkCredential().Password

$Request = @{'username' = $Username
             'password'= $Password
             'action'= 'loggain'}

We then add our “Invoke-WebRequest”-command again:

Invoke-WebRequest -Uri "https://onlinepizza.se/loggain" -Method Post -Body $Request -SessionVariable Global:OnlinePizzaSession -OutFile .\dump.htm

And we should be logged in. When building something like this we should make sure though. This can easily be done by looking for that “You have been logged in!”-text in the dump.htm-file, for example with the “Select-String”-cmdlet.

And while we’re at it, why not delete the dump.htm-file to clean up a bit. That would look like:

$LoggedIn = Select-String -Path .\dump.htm -Pattern "inloggad som $Username" -Quiet

Remove-Item .\dump.htm -Force -Confirm:$false -ErrorAction SilentlyContinue

if ($LoggedIn) {
    Write-Verbose "You are now logged in!"
}
else {
    Write-Error "Login failed!"
}

And that’s it! When put together, the code looks like this:

function Connect-OnlinePizza
{
    [cmdletbinding()]
    param(
          [Parameter(Mandatory=$True)]
          [System.Management.Automation.PSCredential] $Credential)

    $Username = $Credential.UserName
    $Password = $Credential.GetNetworkCredential().Password

    $Request = @{'username' = $Username
                 'password'= $Password
                 'action'= 'loggain'}

    Invoke-WebRequest -Uri "https://onlinepizza.se/loggain" -Method Post -Body $Request -SessionVariable Global:OnlinePizzaSession -OutFile .\dump.htm

    $LoggedIn = Select-String -Path .\dump.htm -Pattern "inloggad som $Username" -Quiet

    Remove-Item .\dump.htm -Force -Confirm:$false -ErrorAction SilentlyContinue

    if ($LoggedIn) {
        Write-Verbose "You are now logged in!"
    }
    else {
        Write-Error "Login failed!"
    }
}

And this is how it looks in action:
Connect-OnlinePizza_screenshot

That’s it for this post. In the next one, we’ll create the function for fetching our account information and one for getting a list of what restaurants are available in our location.

Web scraping with PowerShell (Getting a package trace from a postal service)

Building an advanced function that can consume information on the web is pretty powerfull and I use it for all kinds of things.

In this post I will try to guide you through the process on how to build one for more or less any service, but the example will be the Swedish postal service.

I usually start with a web browser that has some developer features, for example Google Chrome. Go to the website and press Ctrl+Shift+i, select the “network tab” and enter whatever information you need to send to the service, in this case the ID of the package I want to trace.

In this example it should look like this: (I have chosen to use the English version of the website):
ChromeCtrlAltI

Press the submit button and look at the beginning of the network trace. You usually find a GET or POST request there, in this case it is a GET-request.
In this example it looks like this:
ChromePackageTrace

You can right click that row and select “Copy link address”, which in this case is “http://www.posten.se/en/Pages/Track-and-trace.aspx?search=MyPackageID”.

Now open whatever PowerShell script environment you prefer, for example the PowerShell ISE. Start with sending the same request from PowerShell, that can be done by using Invoke-WebRequest (if you are using PowerShell v3 or higher). Start with putting a variable where “MyPackageId” is.

For example:

$Id = "MyPackageId"
$PackageTrace = Invoke-WebRequest -Uri "http://www.posten.se/en/Pages/Track-and-trace.aspx?search=$Id" -UseBasicParsing

The “UseBasicParsing” switch is not mandatory here, but if you don’t need the html returned to be parsed into different objects it is a bit quicker.

We now need to parse the html-code stored in the “Content”-property to get what we want. This can be a bit time consuming, but with a little help from Chrome it gets easier.

Press the magnifier button and hover the mouse over parts of the site or parts of the HTML-code (if you select the “Elements-tab”) and you will soon find what part of the HTML code you need.

In this example the table-tag. Screenshot:
FindWhatYouNeed

Now we need to do some string manipulation to get the parts we need properly formatted. In this case we want to split the HTML to get the parts between the start of the table and the end of it. What we have left is the rows with all the package events, find something that splits them up in to nice pieces, in this case the “tr class=” tag. The first of the rows that gets returned are some table information (containing a unique ID that might change) and the table columns, so we want to skip those. A oneliner that does all of this looks like:

$TraceItems = ((($PackageTrace.Content -split "<table class=`"PWP-moduleTable nttEventsTable`"")&#91;1&#93; -split "</TABLE>")[0]) -split "<tr class=" | Select-Object -Skip 2</code>

We can now loop through these items, parse them and build an object out of them. Each one of these items has three columns; a date, a location and a comment/tracking event. The columns are enclosed in the “TD”-tags so we can split them up at those.

When you have all the values we need we create the object and send it to the pipeline. Could look something like this:

foreach ($TraceItem in $TraceItems) {

    $EventDate = (($TraceItem -split "<td>")[1] -split "</td>")[0]
    $Location = (($TraceItem -split "<td>")[2] -split "</td>")[0]
    $Comment = (($TraceItem -split "<td>")[3] -split "</td>")[0]
    $PackageId = $Id

    $returnObject = New-Object System.Object
    $returnObject | Add-Member -Type NoteProperty -Name EventDate -Value $EventDate
    $returnObject | Add-Member -Type NoteProperty -Name Location -Value $Location
    $returnObject | Add-Member -Type NoteProperty -Name Comment -Value $Comment
    $returnObject | Add-Member -Type NoteProperty -Name Id -Value $PackageId

    Write-Output $returnObject
}

We now have “objectified” a website and made it useful in PowerShell! When we have come this far it’s a good idea to create an advanced function around it to make it really useful.

There are many good posts explaining how that is done, for example this one by Don Jones, so please refer to that if you need some help on getting started.

I have made a quick example of an advanced function out of the code written in this post which is available here.

This is how the function looks in PowerShell (MyPackageId actually seems to be a valid Id, but it looks a bit weird. The output in PowerShell matches the site though):
Get-PackageTrace-dump

Good luck automating anything!

And if you want to learn more, checkout my webscrape guide in this post!

Sending custom “password is about to expire” notifications with PowerShell

Sending out reminders to your users about changing their password before it expires could really take some load of the Helpdesk, and there are a few scripts available that does just that. What I found was that most of these scripts were assuming that everyone in the organization should get the same e-mail, which is not always true.

Therefore I wrote a new one where you could specify how the e-mail should look depending on where in your organization the user works. In our case, we needed to have different languages for different countries, the instructions were different aswell (some users needed to use a password change portal to change their passwords, others are using the classic “CTRL + ALT + DELETE”-method). We also have different contact information for the helpdesk in those countries and departments.

I will do a walk-through of this script to help you customize it to fit your organisation.

The first thing you need to do, is to decide when the users should receive a notification. This is done with these variables:

# Set when users should get a warning...

# First time
$FirstPasswordWarningDays = 14

# Second time
$SecondPasswordWarningDays = 7

# Last time
$LastPasswordWarningDays = 3

Users will then receive a warning 14 days, 7 days and finally 3 days before the password expires. Depending on how the number of days are rounded in the e-mail, it may differ a day from what you specify here.

You then need to set what smtp-server to use:

# Set SMTP-server
$SMTPServer = "MySMTP.Contoso.Com"

There is no need to change the next part of the code, it basically is just calculating when passwords will expire based on your domain policy and what you set in the variables above. It looks like this:

# Get the password expires policy
$PasswordExpiresLength = (Get-ADDefaultDomainPasswordPolicy).MaxPasswordAge

# Calculating when passwords would have been set if they expire today
$CurrentPWChangeDateLimit = (Get-Date).AddDays(-$PasswordExpiresLength.Days)

# Calculating all dates
$FirstPasswordDateLimit = $CurrentPWChangeDateLimit.AddDays($FirstPasswordWarningDays)
$SecondPasswordDateLimit = $CurrentPWChangeDateLimit.AddDays($SecondPasswordWarningDays)
$LastPasswordDateLimit = $CurrentPWChangeDateLimit.AddDays($LastPasswordWarningDays)

We are now ready to load the users, you might want to adjust the filter a bit depending on how your Active Directory design is. Just edit the first part of the filter (Mail -like ‘*@*’) to do this.

# Load the users
$MailUsers = Get-ADUser -Filter "(Mail -like '*@*') -AND `
(PasswordLastSet -le '$FirstPasswordDateLimit' -AND PasswordLastSet -gt '$($FirstPasswordDateLimit.AddDays(-1))' -OR `
PasswordLastSet -le '$SecondPasswordDateLimit' -AND PasswordLastSet -gt '$($SecondPasswordDateLimit.AddDays(-1))' -OR `
PasswordLastSet -le '$LastPasswordDateLimit' -AND PasswordLastSet -gt '$($LastPasswordDateLimit.AddDays(-1))') -AND `
(PasswordNeverExpires -eq '$false' -AND Enabled -eq '$true')" -Properties PasswordLastSet, DisplayName, PasswordNeverExpires, mail

We now got all the users, we just need to loop through them and send out the e-mails. This is where we need to specify which users should get which e-mail.

The comments should give you the information you need to customize it for your environment. Make sure you check out lines 13 and 19 below and change “MyOU1” and “MyOU2” to match your Organizational Units in Active Directory.

# Loop through them
foreach ($MailUser in $MailUsers) {

# Count how many days are left before the password expires and round that number
$PasswordExpiresInDays = [System.Math]::Round((New-TimeSpan -Start $CurrentPWChangeDateLimit -End ($MailUser.PasswordLastSet)).TotalDays)

# Write some status...
Write-Output "$($MailUser.DisplayName) needs to change password in $PasswordExpiresInDays days."

# Build the body depending on where in the organisation the user is

# Change MyOU1 to match your the OU you want your users are in.
if ($MailUser.DistinguishedName -like "*MyOU1*") {
$Subject = "Your password is expiring in $PasswordExpiresInDays days"
$Body = "Hi $($MailUser.DisplayName),

Your password is expiring in $PasswordExpiresInDays days. Please change it now!

Don't forget to change it in your mobile devices if you are using mailsync.

Helpdesk 1"
$EmailFrom = "Helpdesk 1 <[email protected]>"
}
# Change MyOU2 to match your environment
elseif ($MailUser.DistinguishedName -like "*MyOU2*") {
$Subject = "Your password is expiring in $PasswordExpiresInDays days"
$Body = "Hi $($MailUser.DisplayName),

Your password is expiring in $PasswordExpiresInDays days. Please change it now!

Don't forget to change it in your mobile devices if you are using mailsync.

Helpdesk 2"
$EmailFrom = "Helpdesk 2 <[email protected]>"
}
# This is the default e-mail
else {
$Subject = "Your password is expiring in $PasswordExpiresInDays days"
$Body = "Hi $($MailUser.DisplayName),

Your password is expiring in $PasswordExpiresInDays days. Please change it now!

Don't forget to change it in your mobile devices if you are using mailsync.

Helpdesk 3"
$EmailFrom = "Helpdesk 3 <[email protected]>"
}

# Time to send the e-mail

# The line below might need changing depending on what SMTP you are using (authentication or not)
Send-MailMessage -Body $Body -From $EmailFrom -SmtpServer $SMTPServer -Subject $Subject -Encoding UTF8 -BodyAsHtml -To $MailUser.mail

# E-mail is sent!
}

You also need to change the body/subject/mailfrom variables to match what you want to send out. Just add more “elseif”-clauses if you want to send out more versions, or remove them if you don’t need them.

And make sure you configure the “Send-MailMessage”-cmdlet correctly to use your smtp-server if you use authentication or a different port.

All you need to do after that is to schedule the script to run at the same time every day and you are done! (And some testing of course… 🙂 )

Leave a comment if you have any questions!

The complete and uncut code is available here.

Hacking multimedia equipment with PowerShell

I just started on a new part of my home automation project, controlling my receiver (Onkyo TX-NR616).

I thought that this might be a good opportunity to do a “walk-through” on how to create a script for something that clearly was not meant to be controlled with PowerShell, in this case a surround receiver.

The basic methods and principles used here should be applicable to more or less anything you want to automate and I hope someone might find it useful!

Small disclaimer:
I take no responsibility in how you use the information in this post, make sure you know what you are doing! Even though any damage to a receiver or other equipment should be unlikely, I wont give you any guarantees…

So… The steps involved are basically:

  1. Figure out how the item (website, device, software…) is controlled. Does it have a documented API? Is it using REST? Website? Mobile app?
  2. Figure out how to utilize this with PowerShell. If it is a REST-based API, you are lucky, websites or webservices are also highly automatable (always check ToS before doing it though…), if it has a mobile app or similar, it most definitely is using some sort of API which may or may not be easy to figure out.
  3. I usually build a simple script to start doing some testing. Once I figured out how the API works, I turn that into an advanced function.
  4. Enjoy doing yet another thing with the blue console of wonder!

I will now try to describe how I used this basic approach to control my receiver!


So, how is it controlled?

In this case, I knew there was a mobile app available, and therefore, there must be some kind of API. After some research I found out that they are using something called “Integra Serial Communication Protocol”, or eISCP as it is called when used over an ethernet connection.

After some “intense googling” I found some documentation of this protocol at http://blog.siewert.net/?p=37.

Now we know it has an API and we can figure out how it works!

But what if we didn’t have any documentation? Or if we just want to use a few commands (like power on/off), do we really need to learn the complete documentation?

That depends, sometimes you can just “copy -> paste” the commands from a trace. That will be described under the next part of this post; “Using a network trace”.


Using a network trace
Documentation obviously helps a lot, but if we pretend there was none available, should you just give up? Of course not! 🙂

One approach if that is the case is to basically just sniff the network traffic. You can do this with whatever tool you prefer, two free examples are Wireshark and Microsoft Network Monitor.

If you can find a windows application for the device, that helps since you can just sniff your local network traffic. Another alternative if you want to stick to a windows computer but all you can find to control your devices is a mobile app, you could try to run routing and remote access (or internet connection sharing) to just make the traffic go through your PC, which then acts as a router. After that, your network analyzer/sniffer should pick up the traffic, which hopefully will not be encrypted (there are ways of solving that too, but we’ll stick to the simpler scenarios here…).

When you got this ready, just start your sniffer and your application used to control your device, and record whatever command you want to be able to automate.

This is a screenshot of a Wireshark trace recording a “power on” command sent to the Onkyo receiver:

wireshark_capture

Right click the first package sent to receiver and choose “follow TCP stream”. That makes it a bit easier to see what is happening, it looks like this:
follow_trace

The colouring makes it easier to see what gets sent to the receiver and what gets sent back, the first command (light red colouring above) shows what the app sent to turn on the receiver, the dots just represent “non printable characters”, so the command looks somewhat like “ISCP !1PWR01” which does seem like a “power on” command!

Now select “C Arrays” instead of Hex Dump, select the package you want and copy the text, like this:

follow_trace_c_arrays

You now have the whole command needed to turn the device on! Since what you will be sending is byte arrays and not HEX, you need to convert the HEX to Bytes instead. To do this, open a PowerShell prompt, paste the text you copied, add a pipe and write “% { [BYTE]$_ }”, press enter two times and they are converted! Should look like this:
convert_to_bytes

Those bytes are what you need to send using the Send-method of System.Net.Sockets.Socket. More on that follows under the next part of this post!


Sending TCP streams with PowerShell
We now know what we should send, but how?
There are many examples around on how to do this, I will post one that at least I thought was fairly straight forward.

The code looks like this: (Credit to this thread for getting me started!)

# First we need to specify the port and IP-address to device. Both are visible in the wireshark trace above
[int] $Port = 60128
$DeviceAddress = [system.net.IPAddress]::Parse("192.168.1.5")

# Create the IP Endpoint
$Endpoint = New-Object System.Net.IPEndPoint $DeviceAddress, $Port

# Create a socket
$Saddrf = [System.Net.Sockets.AddressFamily]::InterNetwork
$Stype = [System.Net.Sockets.SocketType]::Stream
$Ptype = [System.Net.Sockets.ProtocolType]::TCP
$Socket = New-Object System.Net.Sockets.Socket $saddrf, $stype, $ptype
$Socket.TTL = 32

# Connect the socket to the endpoint
$Socket.Connect($Endpoint)

# Create the byte array
[Byte[]] $ByteArray = 73,83,67,80,0,0,0,16,0,0,0,8,1,0,0,0,33,49,80,87,82,48,49,13,10

# And send it!
$Sent = $Socket.Send($ByteArray)

And the receiver turns on! This code lacks quite a lot, like a method of reading the reply, closing the socket, error handling etc., but it will hopefully give you an idea on how to tackle something like this! If you want something slightly more polished, check the last part of this post…

But I want to do a lot of different things, not just turn it on/off!
I will fix a module for controlling Onkyo receivers as soon as I get more time, in the meantime I have made a “quick and dirty” advanced function that allows you to add the command to a parameter. To give you an idea:
example_of_cmdlet

If you look in the documentation I linked to above, you will probably figure out the commands for more or less anything. I have tested this on my receiver to for example use Spotify, change volume, change inputs and so on…

The module will probably include something like this function to enable a wider range of commands, but will also have cmdlets prepared for powering on, selecting different inputs (including subcategories under “Network”).

This function should just be considered an example on how you can do something like this with PowerShell, and was made since most of you might not be using Onkyo-receivers but still would like some sample code.

The code is available here.

Watering plants with PowerShell

Since we moved to an apartment with a balcony we wanted to have some plants there. The problem is that we’re a lot better at killing plants than actually taking care of them. And even the few days when we actually did remember to water them, the plants could dry out on hot days.

So, how to solve this? With PowerShell of course! 🙂

You could start of with the Telldus PowerShell Module from this blogpost (though, this one is preferred since it handles credentials a lot better). The module is under development but works for checking temperatures, dimming or turning on/off devices etc.

You also need something to water with, I went with a pump from Gardena which runs for 1 minute when turning it on, or 1 min/24h if turned on constantly. This means that switching it off/on will start a watering session. The waterflow is controlled by using different outlets from the pump.

After adding the devices to Telldus Live! you can just open up your favorite powershell editor, import the module and start coding. (The module requires at least PowerShell v3)

An example of how it can be done follows. (The below module has been updated, make sure you check out the new version that uses a PSCredential among other things!)

First import the module, set the credentials and some variables needed: (passthrough for credentials (using “secure string”) is on the ToDo-list)

Import-Module C:\Scripts\Telldus\Module\TelldusModule.psm1

$Username="[email protected]"
$Password="MySecretPassword"

# At what temperature (and above) should I start the pump?
$WhenToWaterTemp=25

# If the humidity get's below this value, I will also start the pump
$WhenToWaterHumidity=40

# How old could the sensor data be before I'll consider it invalid? (in hours)
$DataAgeLimitInHours=2

# Time zone difference compared to telldus servers.
$TimeZoneDifference=2

You don’t need to check for how old the sensor data is, but these sensors can sometimes stop updating, and if they do when it’s hot outside, you might end up drowning your plants if you schedule the script to run often.

We continue to load the data from the sensors:

You could do it like this:

# Get the balcony sensor ID
$BalconySensor=Get-TDSensor -Username $Username -Password $Password | Where-Object { $_.Name -eq "Balcony" }

# Get the sensor data from that ID
$BalconySensorData=Get-TDSensorData -Username $Username -Password $Password -DeviceID $BalconySensor.DeviceID

Or with a one-liner, like this:

$BalconySensorData=Get-TDSensor -Username $Username -Password $Password | where Name -eq "Balcony" | Get-TDSensorData -Username $Username -Password $Password

We now know the temperature and humidity (depening on your sensor capabilites) on the balcony, or wherever you have your plants. We continue with the logic for watering:

# Calculate when to consider the sensor data too old
$CurrentAgeLimit=(Get-Date).AddHours(-($TimeZoneDifference+$DataAgeLimitInHours))

# Check if the data is too old
if ($BalconySensorData.LastUpdate -gt $CurrentAgeLimit) {
    # Check if it's too hot or too dry
    if ($BalconySensorData.Temperature -ge $WhenToWaterTemp -or $BalconySensorData.Humidity -le $WhenToWaterHumidity) {
        # If it was, let's give them some water by turning the pump off and then back on
        Write-Output "The plants are sweating (dry and/or hot)! I'm going to give them some water..."
        Get-TDDevice -Username $Username -Password $Password | Where-Object { $_.Name -like "Balcony Watering System*" } | Set-TDDevice -Username $Username -Password $Password -Action turnOff
        Get-TDDevice -Username $Username -Password $Password | Where-Object { $_.Name -like "Balcony Watering System*" } | Set-TDDevice -Username $Username -Password $Password -Action turnOn
    }
}
else {
    # The data was too old
    Write-Output "Sensordata is too old!"
}

That’s basically it! I added some functionality for doing push-notifications to my phone (Growl API and Boxcar works great for this). Or you could just send an e-mail (you probably want to know if the sensor data isn’t getting updated, for example).

Hope this gives you an idea on what you can do with PowerShell and home automation.

I will try to add other things that I’ve automated with this module when I get the time!

If you have any suggestions, please leave a comment below!

Generating passwords for new user accounts

During our migration to Office 365, we first needed to make sure all the users had an account in Active Directory. In our case, a lot of them didn’t since they only used Notes-applications.

The provisioning/sync of these accounts is for another blog post (or several), but I thought I could share some of the code we use for setting passwords.

First of all, you need something to generate the passwords with. There are a lot of scripts written for this (a good blog post that helped me getting started is this one), but most of them I found are using the same process for creating the passwords.

For example:

Get-Random -Minimum 65 -Maximum 90 | % { [CHAR][BYTE]$_ }

This will generate a random upper case letter between A and Z. If you change the range you can generate any character you want using this method. If you would like some help in finding which character is corresponding to what number you can have a look here.

What most of the scripts I found were lacking was a method of making sure that the passwords generated is actually following the password complexity rules. The passwords generated were random, and of the correct length, but you didn’t know if the different characters required were actually in the password.

So I ended up with doing my own function for this. It’s pretty short so I’ll do a code walkthrough of the important parts in it.

First, we need to specify what characters must be included in the password. I did this by creating four different arrays. You might want to have some control of which special characters are included since some applications (if the password is not for Active Directory accounts) can’t handle some of them. And you might not want your users to have to change their keyboard layout to be able to log in 🙂

You could do something like this:

# Set which characters should be used
$CapitalLetters=For ($a=65;$a –le 90;$a++) { [char][byte]$a }
$SmallLetters=For ($a=97;$a –le 122;$a++) { [char][byte]$a }
$Numbers=0..9
$SpecialCharacters="!","@","#","%","&","?","+","*","=","£","\"

$AllCharacters=$CapitalLetters+$SmallLetters+$Numbers+$SpecialCharacters

It is now time to actually build a password. I did this with a loop which will execute until it reaches $PasswordLength, which is a parameter for the function.

It looks like this:

# Loop until we reach the password length
for ($CharNr=$NrOfCharacterTypes;$CharNr -le $PasswordLength;$CharNr++) {

# If this is the first run, we should add one of every character type
if ($CharNr -eq $NrOfCharacterTypes) {
$CharacterString+=($CapitalLetters | Get-Random)
$CharacterString+=($SmallLetters | Get-Random)
$CharacterString+=($Numbers | Get-Random)
$CharacterString+=($SpecialCharacters | Get-Random)
}
# If not, start adding random characters.
else {
$CharacterString+=($AllCharacters | Get-Random)
}
}

$CharacterString now contains all the characters we need. But we don’t want the passwords to always have the character types in the same order (first a capital letter, then a small, then a number then a special character, and then random) since that would make the password a lot weaker.

To fix this we turn it into an array and then randomize the order of the characters, and finally send it back to the pipeline.

Like this:

# Create an char array of the characters
$TempPasswordArray=$CharacterString.ToString().ToCharArray()

# Randomize the order of them
$PasswordToReturn=($TempPasswordArray | Get-Random -Count $TempPasswordArray.length) -join ''

# Send it back to the pipeline
Write-Output $PasswordToReturn

This password will always contain all the character types we have specified. And they will always be random.

The complete code (which includes the $NrOfCharacterTypes and some other things), are available here.

Automate SCOM Gateway Certificate Renewal

When deploying SCOM (System Center Operations Manager) in a multi-forest environment, you use certificates to establish the trust between the servers. Since we have CA Servers in every domain, we started up with configuring autoenrollment for all the SCOM Gateway Servers, and made sure all the different CA servers were added to the trust-store of the central servers. (I will not go through that process now, if you want me to, leave a comment).

So autoenrollment now works, but that isn’t really enough, is it? We still need to configure the Gateway Server to actually switch to the new certificate when it arrives.

The tool Microsoft has given to us to do this is MOMCertImport.exe, but that tool gives you a pop-up that you actually need to click on… Not very “automatable”.

After some research, we could find that all this tool seems to do is to add the certificates serial number, backwards (in pairs), as a binary key in the registry. That is very automatable! 🙂

Before you start, you should know that this method is probably NOT supported by Microsoft, on the other hand, if it fails, you could run MOMCertImport.exe and see if that helps…

A code walkthrough follows:

Let’s start with setting up some user controlled variables, like what Certificate Template is used and where the registry key is located:

# Specify SCOM Template name
$SCOMTemplateName="SCOM Template"

# Specify SCOM Certificate Registry Key Path
$SCOMCertRegPath="HKLM:\SOFTWARE\Microsoft\Microsoft Operations Manager\3.0\Machine Settings"

# Specify SCOM Certificate Registry Value Name
$SCOMCertRegValueName="ChannelCertificateSerialNumber"

We then need a way of going through the certificates on the server to see if a new certificate has arrived:

# Initialize new array
$ParsedCertificates=@()

# List all local certificates
$LocalCertificates=Get-ChildItem Cert:\LocalMachine\My

# Go through the certificate and parse them to get the certificate template information out
foreach ($LocalCertificate in $LocalCertificates) {

$ParsedCertificates+= $LocalCertificate | Select `
Friendlyname,
Thumbprint,
SerialNumber,
NotAfter,
NotBefore,
@{Name="Template";Expression={($_.Extensions |
Where-Object {$_.oid.Friendlyname -match "Certificate Template Information"}).Format(0) -replace "(.+)?=(.+)\((.+)?", '$2'}},
@{Name="Subject";Expression={$_.SubjectName.name}}
}

As you can see, you need some regex to get the actual Certificate Template name. This should probably be turned into an advanced function! I might put that on a ToDo-list…

Now we have all the information we need to check if a new SCOM Gateway certificate has arrived.

I thought the easiest way of doing that was by getting the serial number of the latest certificate from that template, like this:

# Load the serial number of the newest SCOM Certificate into a new variable
$SerialNumber=($ParsedCertificates | Where-Object { $_.Template -eq $SCOMTemplateName } | Sort-Object NotAfter -Descending | select -First 1).SerialNumber

It’s now time for some regex-magic again, we want to pair this number up (2 and 2), and then reverse those pairs. I must confess I did a couple of rewrites of this before I found one that seems quite effective:

# Reverse the serial number to match the format in the registry
$ReversedPairs=[regex]::Matches($SerialNumber,'..','RightToLeft') | ForEach-Object { $_.Value }

The two dots (‘..’) tells powershell to group them, and the ‘RightToLeft’ reverses them. The last foreach is to get only the values and nothing else.
But it needed to be in binary format aswell, we achieve that by doing this:

# Convert string to binary
$ReversedPairsInBinary=$ReversedPairs | ForEach-Object { [convert]::ToByte($_,16) }

We now have something that we can compare with the current registry value, so let’s load the current one:

# Load current serial number into variable
$CurrentSCOMCertificate=Get-ItemProperty -Path $SCOMCertRegPath | Select-Object $SCOMCertRegValueName -ExpandProperty $SCOMCertRegValueName

And now let’s join the arrays and compare them, and based on the results update the registry if needed and restart the SCOM Gateway Service.

# Check if we have a new certificate
if (($ReversedPairsInBinary -join "") -eq ($CurrentSCOMCertificate -join "")) {
Write-Output "The current certificate is the latest."
}
else {
Write-Output "New certificate found. Changing registry..."
# Write to registry key
New-ItemProperty -Path $SCOMCertRegPath -Name $SCOMCertRegValueName -Value $ReversedPairsInBinary -Type Binary -Force

Write-Output "Restarting health service..."
# Restart the Health Service
Restart-Service -Name HealthService -Force
}

And we are done!

The complete and uncut code for this script is available here.

Good luck! 🙂