Category Archives: Office 365

Managing Office 365 and Azure AD with Azure Automation

Update:
The Windows Azure Active Directory Module that was in preview when this was posted has been released and can be deployed straight to Azure Automation from this page: http://www.powershellgallery.com/packages/MSOnline/1.0

The original post follows:

The Azure AD PowerShell module have some dependencies that historically made it fail in Azure Automation. In fact, it’s the most upvoted suggestion for Azure Automation at the time of writing this.

But very recently a public preview of a new version of the module was released where the authentication part has been changed to use ADAL instead, which seems to fix this issue!

This is how you can test it yourself:

First, you need to uninstall any previous version of the module you might have. If you can, go ahead and uninstall the Microsoft Online Services Sign-In Assistant as well to make sure the new module works as expected (the dependency on this service is now removed).

Then go to the download page for the preview version of module, download it and install it. The installation procedure is very simple:
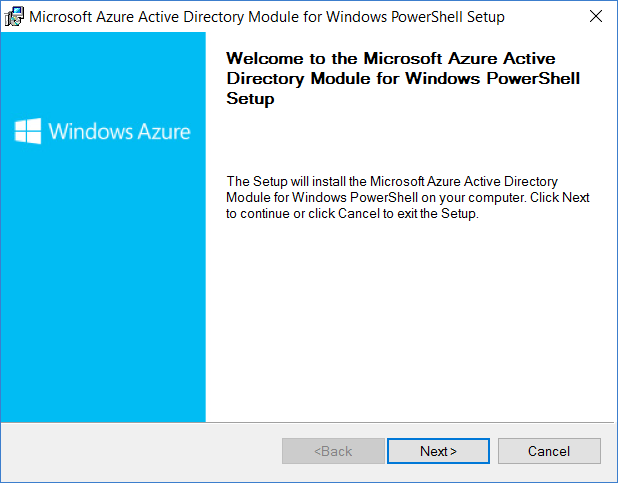
Wizard1

Click next…

Wizard2

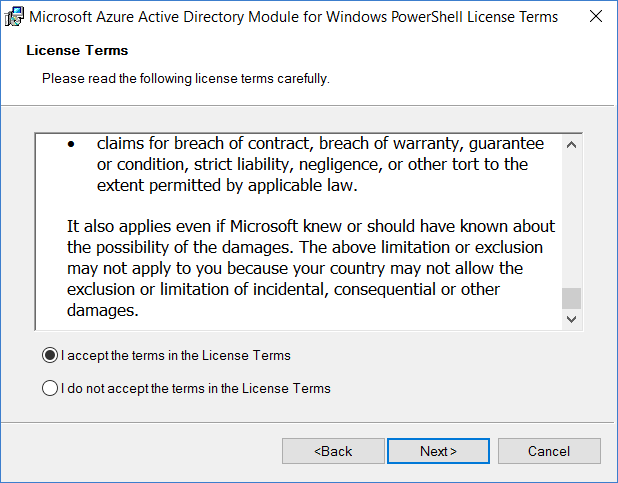
Read the license terms, and check the box if you agree. Click next again…

Wizard3

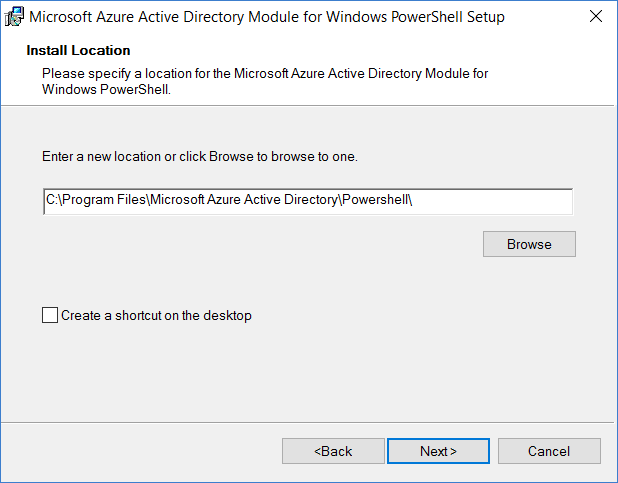
Choose an installation path (this actually not where the module currently ends up though, just the EULA-file…).

Wizard4

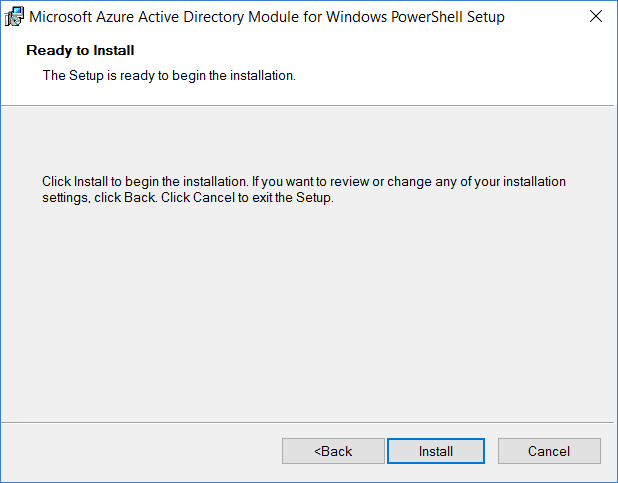
Click Install to begin the installation, and confirm the UAC-prompt if you get one.

Wizard5

The installation runs…

Wizard6

And finally, just click Finish and the module is installed.

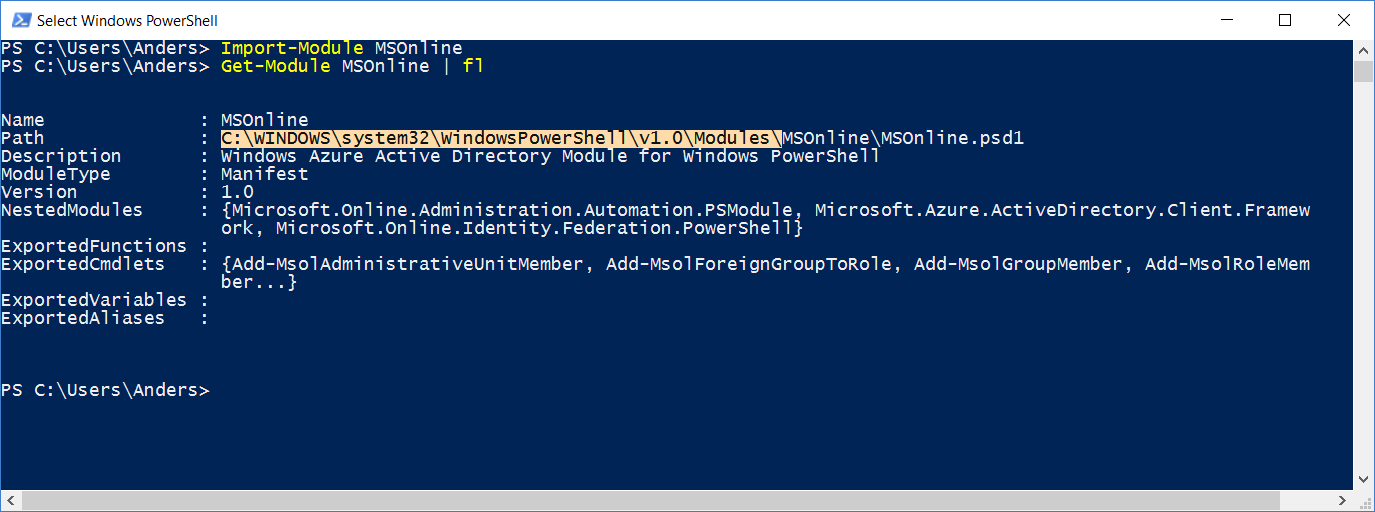
Now open a PowerShell prompt, and run the following commands:
Import-Module MSOnline
Get-Module MSOnline | Format-List

In the property “Path”, you’ll see where the module was installed, in my case it was “C:\WINDOWS\system32\WindowsPowerShell\v1.0\Modules\”:
ModuleInstallPath

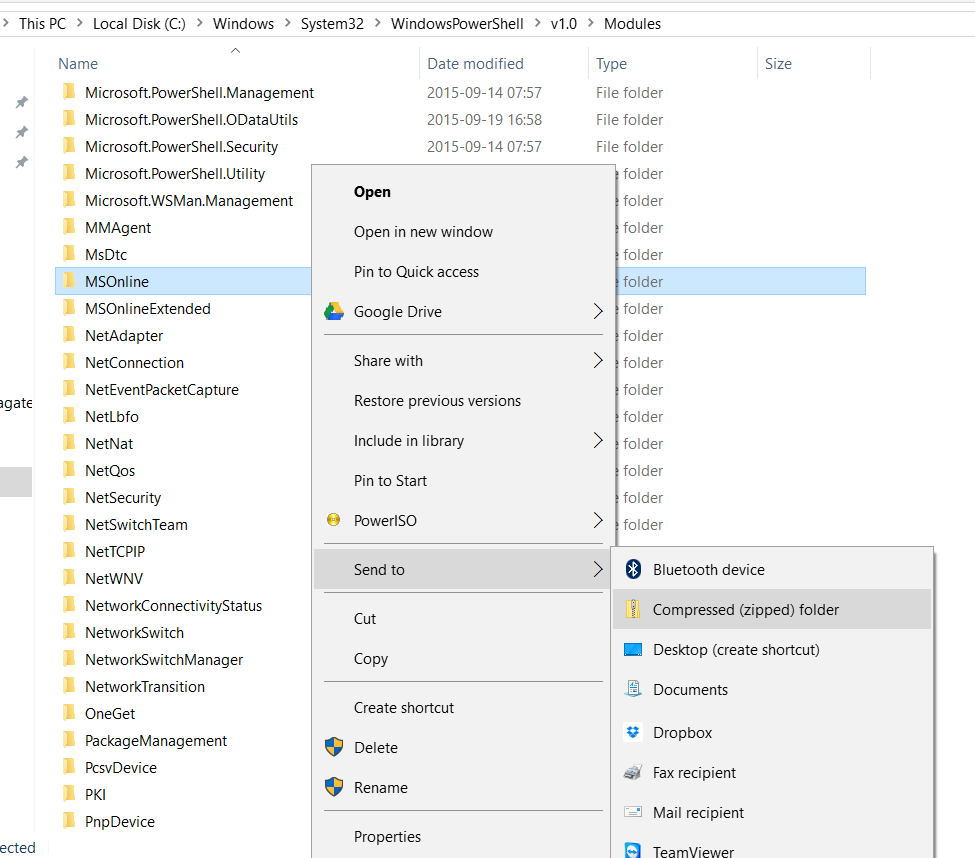
Go to that folder and zip the folders MSOnline and MSOnlineExtended, easiest way is probably to right-click on the folder, choose “Send to”, and then “Compressed (zipped) folder”, do this for both (one at a time). Should look something like this:
SendToZip

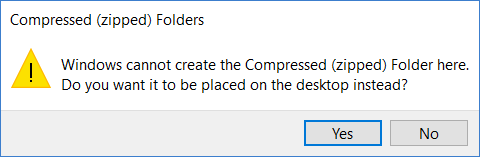
It will prompt you to place the zipped files on your desktop instead of the current folder, which is a good idea, so click “Yes” 🙂
PlaceOnDesktop

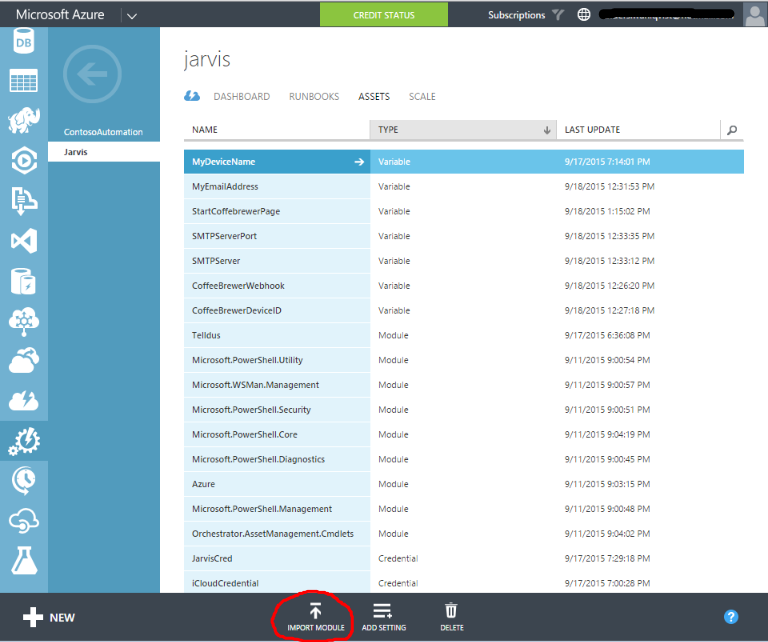
You can now import those zip-files into Azure Automation. I recommend that you do this in the classical portal (I’ve had some issues when importing modules in the preview portal).

First, go to your automation account, then go to assets, and then click “Import Module” at the bottom:
AzurePortal_ImportModule

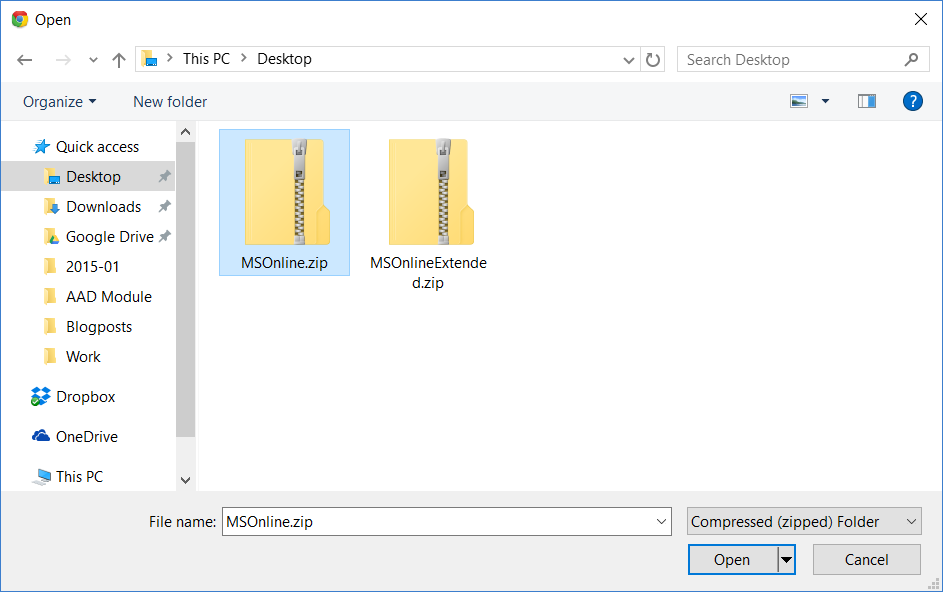
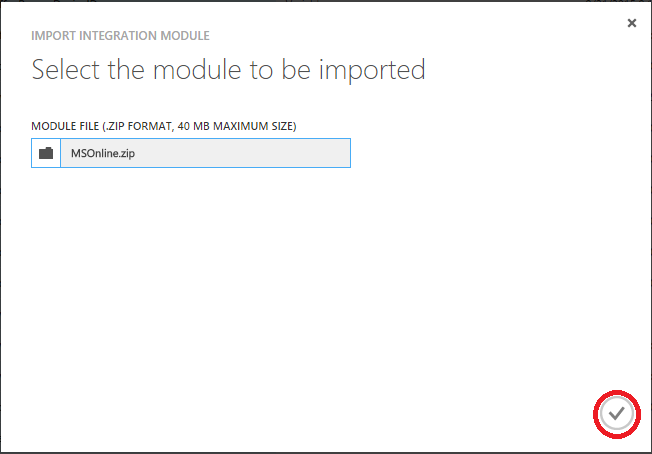
Browse to your zipped module and click open:
AAPortalBrowseChooseModule

Click complete in lower right corner:
ImportModuleDialogClassicPortal

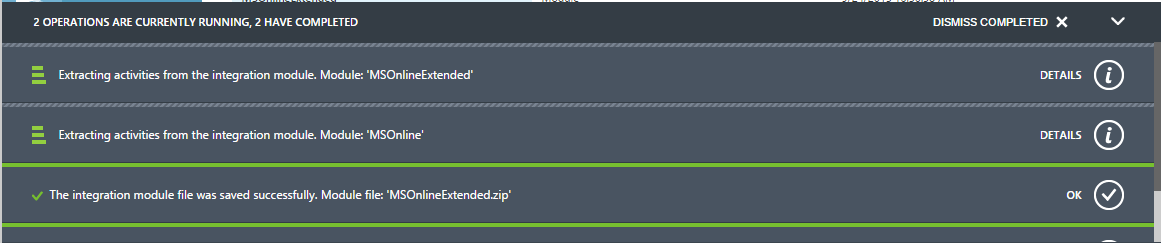
Repeat for both modules. You can follow the process at the bottom of the page:
ModuleImporting

When everything is done, you should be able to use the module in Azure Automation. A simple native PowerShell script runbook that just lists some users would look like this:

$AzureCred = Get-AutomationPSCredential -Name 'AzureADCred'

Connect-MsolService -Credential $AzureCred

Get-MsolUser

To give you an idea of how to assign a license:

$AzureCred = Get-AutomationPSCredential -Name 'AzureADCred'

Connect-MsolService -Credential $AzureCred

$UserPrincipalName = '[email protected]'
$AccountSkuId = 'mytenant:O365_BUSINESS_PREMIUM'

$LicenseOptions = New-MsolLicenseOptions -AccountSkuId $AccountSkuId -DisabledPlans $null

Set-MsolUserLicense -UserPrincipalName $UserPrincipalName -LicenseOptions $LicenseOptions -AddLicenses $AccountSkuId

I haven’t tested the preview module fully in Azure Automation yet, but so far it seems to work fine (adding licenses and so on works!). Try it yourself and share your experiences!

Happy automating Azure AD with Azure Automation 🙂

Sending custom “password is about to expire” notifications with PowerShell

Sending out reminders to your users about changing their password before it expires could really take some load of the Helpdesk, and there are a few scripts available that does just that. What I found was that most of these scripts were assuming that everyone in the organization should get the same e-mail, which is not always true.

Therefore I wrote a new one where you could specify how the e-mail should look depending on where in your organization the user works. In our case, we needed to have different languages for different countries, the instructions were different aswell (some users needed to use a password change portal to change their passwords, others are using the classic “CTRL + ALT + DELETE”-method). We also have different contact information for the helpdesk in those countries and departments.

I will do a walk-through of this script to help you customize it to fit your organisation.

The first thing you need to do, is to decide when the users should receive a notification. This is done with these variables:

# Set when users should get a warning...

# First time
$FirstPasswordWarningDays = 14

# Second time
$SecondPasswordWarningDays = 7

# Last time
$LastPasswordWarningDays = 3

Users will then receive a warning 14 days, 7 days and finally 3 days before the password expires. Depending on how the number of days are rounded in the e-mail, it may differ a day from what you specify here.

You then need to set what smtp-server to use:

# Set SMTP-server
$SMTPServer = "MySMTP.Contoso.Com"

There is no need to change the next part of the code, it basically is just calculating when passwords will expire based on your domain policy and what you set in the variables above. It looks like this:

# Get the password expires policy
$PasswordExpiresLength = (Get-ADDefaultDomainPasswordPolicy).MaxPasswordAge

# Calculating when passwords would have been set if they expire today
$CurrentPWChangeDateLimit = (Get-Date).AddDays(-$PasswordExpiresLength.Days)

# Calculating all dates
$FirstPasswordDateLimit = $CurrentPWChangeDateLimit.AddDays($FirstPasswordWarningDays)
$SecondPasswordDateLimit = $CurrentPWChangeDateLimit.AddDays($SecondPasswordWarningDays)
$LastPasswordDateLimit = $CurrentPWChangeDateLimit.AddDays($LastPasswordWarningDays)

We are now ready to load the users, you might want to adjust the filter a bit depending on how your Active Directory design is. Just edit the first part of the filter (Mail -like ‘*@*’) to do this.

# Load the users
$MailUsers = Get-ADUser -Filter "(Mail -like '*@*') -AND `
(PasswordLastSet -le '$FirstPasswordDateLimit' -AND PasswordLastSet -gt '$($FirstPasswordDateLimit.AddDays(-1))' -OR `
PasswordLastSet -le '$SecondPasswordDateLimit' -AND PasswordLastSet -gt '$($SecondPasswordDateLimit.AddDays(-1))' -OR `
PasswordLastSet -le '$LastPasswordDateLimit' -AND PasswordLastSet -gt '$($LastPasswordDateLimit.AddDays(-1))') -AND `
(PasswordNeverExpires -eq '$false' -AND Enabled -eq '$true')" -Properties PasswordLastSet, DisplayName, PasswordNeverExpires, mail

We now got all the users, we just need to loop through them and send out the e-mails. This is where we need to specify which users should get which e-mail.

The comments should give you the information you need to customize it for your environment. Make sure you check out lines 13 and 19 below and change “MyOU1” and “MyOU2” to match your Organizational Units in Active Directory.

# Loop through them
foreach ($MailUser in $MailUsers) {

# Count how many days are left before the password expires and round that number
$PasswordExpiresInDays = [System.Math]::Round((New-TimeSpan -Start $CurrentPWChangeDateLimit -End ($MailUser.PasswordLastSet)).TotalDays)

# Write some status...
Write-Output "$($MailUser.DisplayName) needs to change password in $PasswordExpiresInDays days."

# Build the body depending on where in the organisation the user is

# Change MyOU1 to match your the OU you want your users are in.
if ($MailUser.DistinguishedName -like "*MyOU1*") {
$Subject = "Your password is expiring in $PasswordExpiresInDays days"
$Body = "Hi $($MailUser.DisplayName),

Your password is expiring in $PasswordExpiresInDays days. Please change it now!

Don't forget to change it in your mobile devices if you are using mailsync.

Helpdesk 1"
$EmailFrom = "Helpdesk 1 <[email protected]>"
}
# Change MyOU2 to match your environment
elseif ($MailUser.DistinguishedName -like "*MyOU2*") {
$Subject = "Your password is expiring in $PasswordExpiresInDays days"
$Body = "Hi $($MailUser.DisplayName),

Your password is expiring in $PasswordExpiresInDays days. Please change it now!

Don't forget to change it in your mobile devices if you are using mailsync.

Helpdesk 2"
$EmailFrom = "Helpdesk 2 <[email protected]>"
}
# This is the default e-mail
else {
$Subject = "Your password is expiring in $PasswordExpiresInDays days"
$Body = "Hi $($MailUser.DisplayName),

Your password is expiring in $PasswordExpiresInDays days. Please change it now!

Don't forget to change it in your mobile devices if you are using mailsync.

Helpdesk 3"
$EmailFrom = "Helpdesk 3 <[email protected]>"
}

# Time to send the e-mail

# The line below might need changing depending on what SMTP you are using (authentication or not)
Send-MailMessage -Body $Body -From $EmailFrom -SmtpServer $SMTPServer -Subject $Subject -Encoding UTF8 -BodyAsHtml -To $MailUser.mail

# E-mail is sent!
}

You also need to change the body/subject/mailfrom variables to match what you want to send out. Just add more “elseif”-clauses if you want to send out more versions, or remove them if you don’t need them.

And make sure you configure the “Send-MailMessage”-cmdlet correctly to use your smtp-server if you use authentication or a different port.

All you need to do after that is to schedule the script to run at the same time every day and you are done! (And some testing of course… 🙂 )

Leave a comment if you have any questions!

The complete and uncut code is available here.

Set permissions on properties in Active Directory (Write Members in ACL) (Shared mailbox management)

This was one of the trickier tasks to accomplish. The first steps in creating the shared mailbox is not hard, just create the user (disabled) and groups (access group and owner group). But to delegate control of one the groups to the other is another thing. (setting the ManagedBy-attribute is not enough, you need the user(s) to be able to update the membership list aswell. In the GUI this setting is called “Manager can update membership list” which is a tickbox that actually just sets the “write” permission on the “Members” property.

I wrote a function for doing this, which is far from complete, but since it works well for us I thought I should share it.

The usual disclaimer is needed here:
Please make sure you test this before running it production! I have only tested this code for setting the write permission (allow/deny) on the Members property on Groups, nothing else!

When I get the time I will try to expand this to setting access rights on OUs etc. aswell, which would make automated delegation a lot easier. (And pipeline support etc…)

In the meantime, just take it for what it is 🙂

An example on how to use the function is:

Add-ADGroupPropertyPermission -ADObject TheMailboxAccessGroup -MasterObject TheMailboxOwnerGroup -AccessRight WriteProperty -AccessRule Allow -Property Member

And you are done!

The code is available here.

Shared Mailbox Management – Automated!

This can be quite hard in a large organisation. It’s one thing to migrate the ACLs to Office 365 one time, it’s another thing to keep them updated.

At least I was kind of lost on how to tackle this problem in the beginning.

This is probably not the perfect solution, but it saves us a lot of time!

Short version (everything in the list below is done by powershell):

  1.  The shared mailbox user account gets created by a powershell script that reads the output of the order form (which currently gets approved/created by helpdesk).
  2.  An access group gets created
  3.  An owner group gets created
  4.  The ACLs of the access group is changed so the owner group has access to change it’s members, and the “Managed By”-attribute is set.
  5. The owner group becomes a member of another group, which gives access to a powershell form published in our Citrix-farm. This form is used for managing the membership of the mailbox access group.
  6. The owner (typically the person who ordered the mailbox) gets added to Owner-group and Access-group.
  7.  Another script looks for new access groups and shared mailboxes, finds it in Exchange Online/Azure, creates the shared mailbox and assigns the “Full Access/Send As”-rights to the “access group”.
  8. All the ACLs are verified to make sure everything went according to plan.
  9. If everything has been done correctly, an e-mail gets sent to the members of the “owner-group” with a link to a guide explaining where to find the Citrix app (PowerShell form), how to add the new mailbox in outlook etc….

The PowerShell-form, when started by a user, finds all the “Owner-groups” the current user is a member of and lists the corresponding mailboxes in a droplist. When a mailbox is selected, it lists the members and allows the user to add new ones and remove current ones.

You search by entering a Name, E-mailaddress or SamAccountName, the search goes off “in real time” (OnChange), no search button.

Here’s a screenshot of the form when started:

mbx-management

This is how it looks when a mailbox is selected: (sorry for all the blurring…)

MBXInAction

This allows any user to manage their own mailbox in an easy and userfriendly way, and they dont need to contact helpdesk everytime someone else needs access to the mailbox, or needs to be removed.

And that’s it! 🙂

I will try to do some blog posts on the steps involved in this process, at least those who were kind of tricky to achieve. (Setting ACLs in AD was not as straightforward as I thought…)

Any code that I think is applicable for someone else will of course be published!

Stay tuned!

Office 365 PowerShell Toolbox – Oneliners to rule them all!

In this post, I will try to add some of the commands you need for managing Office 365, and some code snipets to do pre-migration checks and so on.

I will edit this post and keep adding things to keep them in one place.

Connecting to MSOL/Exchange Online

To connect to MSOL you simple run:

Connect-MsolService

To connect to Exchange Online:

$UserCredential = Get-Credential

$Session = New-PSSession -ConfigurationName Microsoft.Exchange -ConnectionUri https://ps.outlook.com/powershell/ -Credential $UserCredential -Authentication Basic -Allow

Import-PSSession $Session

If you you are behind a proxy-server, you might need to add some session options. Like this (if you configured proxy in IE):

$proxysettings = New-PSSessionOption -ProxyAccessType IEConfig
$Session = New-PSSession -ConfigurationName Microsoft.Exchange -ConnectionUri https://ps.outlook.com/powershell -Credential $UserCredential -Authentication Basic -Allow -SessionOption $proxysettings

To save your credentials to be used in an automated script, you can do this:

# Get the credential into a variable
$MyCredential = Get-Credential

# Convert the password to an encrypted string and save to file
$MyCredential.Password | ConvertFrom-SecureString | Out-File .\Password.txt

# To load the credential...

# Set your username
$User = "[email protected]"

# Get the password from the file
$Password = Get-Content .\Password.txt | ConvertTo-SecureString

# Build the credential
$O365Credential = New-Object System.Management.Automation.PsCredential($User,$Password)

That credential can now be used togheter with the Connect-MsolService/New-PSSession cmdlets.

List all users and their AccountSkuId/License
This might sound easy, but the “Get-MsolUser”-cmdlet is returning an advanced object which makes it a bit difficult to export to for example a csv-file.

But if you use the Select-Object-cmdlet togheter with an expression you will get the job done!

You could to something like this to expand the AccountSkuId for all your users:

Get-MsolUser -All | Select-Object UserPrincipalName, @{Name="License" ; Expression={ ($_ | select -ExpandProperty Licenses | select -ExpandProperty AccountSkuId ) } }

Just pipe that to for example Export-Csv to save the information on disk.

Duplicates in forwarding address

If you have multiple smtp-domains, you might run into a problem with duplicates if you only have one *.onmicrosoft.com domain (simpler than creating multiple ones). Want to see if this is a problem in your domain?

This is one way of doing it:

$Duplicates=Get-ADUser -Filter * | Group-Object { ($_.UserPrincipalName -split "@")[0] } | Where-Object Count -gt 1

$Duplicates now contains all of the users that will be a problem if you only have one “forwarding domain”. There are many options to solve this, forward to something else (AccountName or similiar), add a part of the maildomain left of the @-sign etc…

Managing Mobile Devices

To add a device for a user:

Set-CASMailbox -Identity '[email protected]' -ActiveSyncAllowedDeviceIDs ($MyArrayWithDeviceIDs)

To get all device id’s associated with a user:

Get-CASMailbox -Identity '[email protected]' | select -ExpandProperty ActiveSyncAllowedDeviceIDs

Clear all allowed devices:

Set-CASMailbox -Identity '[email protected]' -ActiveSyncAllowedDeviceIDs $null

Setting a license

To give a user a license you could do something like this:

# Create the license options (if you need to disable some plans)
$LicenseOptions = New-MsolLicenseOptions -AccountSkuId $AccountSkuId -DisabledPlans $DisabledPlans

# Set the country (two letter "code")
Set-MsolUser -UserPrincipalName $UserAccount -UsageLocation $UsageLocation

# Set the license
Set-MsolUserLicense -UserPrincipalName $UserAccount -AddLicenses $AccountSkuId -LicenseOptions $LicenseOptions

# If you don't need to disable anything just use this instead of the above:
Set-MsolUserLicense -UserPrincipalName $UserAccount -AddLicenses $AccountSkuId

Creating Shared Mailboxes
To create a shared mailbox, you first have to give it a temporary license to create the mailbox (see above), then set it to shared, remove the license and add the permissions that are needed.

If the mailbox has a license you could do something like this:

# Set it to shared (mailbox need to exist first, so set a license, wait, and then try this)
Set-Mailbox '[email protected]' -Type Shared -ProhibitSendReceiveQuota 5GB -ProhibitSendQuota 4.75GB -IssueWarningQuota 4.5GB

# Set full access permissions
Add-MailboxPermission '[email protected]' -User 'GroupOrUserName' -AccessRights FullAccess -Confirm:$false

# Set 'SendAs' permission if needed
Add-RecipientPermission '[email protected]' -Trustee 'GroupOrUserName' -AccessRights SendAs -Confirm:$false

# Remove the license
Set-MsolUserLicense -UserPrincipalName '[email protected]' -RemoveLicenses $AccountSkuId

Change UPN of a licensed user
If the user UPN prefix (left of @) changes, DirSync will fix it automatically, if the domain part change, you need to run a few commands to change it.

The overall process is to change it in the On-Prem AD, change it in Azure to your “*.onmicrosoft.com”-domain, and then change it to the new domain.

Example, we need to change John Doe’s smtp domain from “contoso.com” to “contoso2.com”:


# Set the new UPN in Active Directory
Set-Aduser -identity JohnDoe -UserPrincipalName '[email protected]'

# Change the UPN in Azure to a temporary one
Set-MsolUserPrincipalName -UserPrincipalName '[email protected]' -NewUserPrincipalName '[email protected]'

# Change it to the new one
Set-MsolUserPrincipalName -UserPrincipalName '[email protected]' -NewUserPrincipalName '[email protected]'

Run a DirSync and you are done!

Add a Room
To add a room mailbox and set it to auto-accept a booking (if the time slot is free), and make it possible for your users to book it a year ahead (for example) you do the following:


# Create the room (with seats for 20 people)
New-Mailbox -Name "ConferenceRoom1" -DisplayName "Conference Room 1" -PrimarySmtpAddress "[email protected]" -Office "Contoso HQ" -ResourceCapacity 20 -Room

# Make it accept invitations if the time slot is free, 
Set-CalendarProcessing "ConferenceRoom1" -AutomateProcessing AutoAccept -BookingWindowInDays 365

If you run Outlook 2010 or newer (or the OWA) you most certainly want to create a roomlist. The users can then pick that list and see all available rooms right away. You might want to name it after the Office location or similar.

To add a room list and add a room to that list you do the following:


# Add the room list
New-DistributionGroup -Name "ContosoHQ-Rooms" -DisplayName "Contoso HQ" –PrimarySmtpAddress "[email protected]" –RoomList

# Add a room to it
Add-DistributionGroupMember –Identity "ContosoHQ-Rooms" -Member "ConferenceRoom1"

You might need to update your offline address book before this works properly in Outlook, it should work pretty much instantly in the OWA.

Migrating from Lotus Notes to Office 365 – The PowerShell Saga

The last few months have been pretty intense, but we finally finished moving ~18000 mailboxes from Lotus Notes to Office 365. I went to the first startup meeting for the implementation part of the project in late September, and we finished most of the migration this week, which was pretty satisfying to say the least 🙂

It has been a long journey (done in a short timeframe), and a lot of things needed to be done in order for it to work.

Some of the obstacles we (and probably everyone who does a migration) needed to solve were:

  • Changing UPN’s on all the accounts to the users primary smtp address
  • Establish ADFS and DirSync
  • Changing certificates that were using the current UPN’s and therefor would be rendered invalid.
  • Import the ~8000 accounts that only existed in Domino and not in Active Directory and keep them synced.
  • Sync the other 10000 accounts that existed in both Domino and Active Directory
  • Migrate distribution lists
  • Migrate rooms
  • Migrate shared mailboxes with their access lists
  • Build forms to enable users to do some of the management themselves
  • Make sure mail flow works during the “hybrid” period
  • Migrating mobile device id’s allowed to sync through Active Sync
  • Provisioning of new accounts in Office 365 that work with our current processes
  • Automate all the common tasks (creating mailboxes, shared mailboxes, managing distribution lists, approving devices, managing licenses etc.)
  • And more… 🙂

Since a lot of people out there are probably doing, or will be doing, the same thing we did, I will try to do a couple of post on how we solved these tasks (at least those related to powershell), share some code and good cmdlets for managing everything from rooms to mobile devices,

Hopefully this will become a good repository for myself and for anyone out there facing the same challenge we did 🙂

Generating passwords for new user accounts

During our migration to Office 365, we first needed to make sure all the users had an account in Active Directory. In our case, a lot of them didn’t since they only used Notes-applications.

The provisioning/sync of these accounts is for another blog post (or several), but I thought I could share some of the code we use for setting passwords.

First of all, you need something to generate the passwords with. There are a lot of scripts written for this (a good blog post that helped me getting started is this one), but most of them I found are using the same process for creating the passwords.

For example:

Get-Random -Minimum 65 -Maximum 90 | % { [CHAR][BYTE]$_ }

This will generate a random upper case letter between A and Z. If you change the range you can generate any character you want using this method. If you would like some help in finding which character is corresponding to what number you can have a look here.

What most of the scripts I found were lacking was a method of making sure that the passwords generated is actually following the password complexity rules. The passwords generated were random, and of the correct length, but you didn’t know if the different characters required were actually in the password.

So I ended up with doing my own function for this. It’s pretty short so I’ll do a code walkthrough of the important parts in it.

First, we need to specify what characters must be included in the password. I did this by creating four different arrays. You might want to have some control of which special characters are included since some applications (if the password is not for Active Directory accounts) can’t handle some of them. And you might not want your users to have to change their keyboard layout to be able to log in 🙂

You could do something like this:

# Set which characters should be used
$CapitalLetters=For ($a=65;$a –le 90;$a++) { [char][byte]$a }
$SmallLetters=For ($a=97;$a –le 122;$a++) { [char][byte]$a }
$Numbers=0..9
$SpecialCharacters="!","@","#","%","&","?","+","*","=","ÂŁ","\"

$AllCharacters=$CapitalLetters+$SmallLetters+$Numbers+$SpecialCharacters

It is now time to actually build a password. I did this with a loop which will execute until it reaches $PasswordLength, which is a parameter for the function.

It looks like this:

# Loop until we reach the password length
for ($CharNr=$NrOfCharacterTypes;$CharNr -le $PasswordLength;$CharNr++) {

# If this is the first run, we should add one of every character type
if ($CharNr -eq $NrOfCharacterTypes) {
$CharacterString+=($CapitalLetters | Get-Random)
$CharacterString+=($SmallLetters | Get-Random)
$CharacterString+=($Numbers | Get-Random)
$CharacterString+=($SpecialCharacters | Get-Random)
}
# If not, start adding random characters.
else {
$CharacterString+=($AllCharacters | Get-Random)
}
}

$CharacterString now contains all the characters we need. But we don’t want the passwords to always have the character types in the same order (first a capital letter, then a small, then a number then a special character, and then random) since that would make the password a lot weaker.

To fix this we turn it into an array and then randomize the order of the characters, and finally send it back to the pipeline.

Like this:

# Create an char array of the characters
$TempPasswordArray=$CharacterString.ToString().ToCharArray()

# Randomize the order of them
$PasswordToReturn=($TempPasswordArray | Get-Random -Count $TempPasswordArray.length) -join ''

# Send it back to the pipeline
Write-Output $PasswordToReturn

This password will always contain all the character types we have specified. And they will always be random.

The complete code (which includes the $NrOfCharacterTypes and some other things), are available here.

Getting pictures converted for ThumbnailPhoto to be used in Lync/Outlook (ConvertTo-ADThumbnail)

There are obviously a lot of things that needs to be migrated when changing mail platform, one of those things that are a “very nice to have” is user pictures/thumbnails which shows up in Outlook, OWA, Lync and so on…

But this can be quite a challenge. The pictures are stored in the “ThumbnailPhoto”-attribute as a byte array, which needs the picture size to be less than 10 kb to work in lync/outlook (actually, the “Active Directory Users & Computers”-snapin wants it under 8 kb to be shown in the attribute editor so this is what we choose).

The pictures from Notes are “user generated”, they can be gif, jpg, png, bmp or something else, and I’m guessing this would be the case for many large organisations out there.

The solution we used was to add a step in our “Notes to Active Directory”-script to check if a picture is available, if it is, it uses a small “advanced function” I wrote to convert the picture to a byte array, and save a copy of the new file on disk, it’s called ConvertTo-ADThumbnail. It also output’s the changes in size if that’s needed.

It looks like this:

PS H:\> ConvertTo-ADThumbnail -PictureFile .\MyPrettyPicture.jpg

OrgFilename : .\MyPrettyPicture.jpg OrgFileSize : 33,748046875 OrgFileWidth : 400 OrgFileHeight : 300 NewFilename : H:\\MyPrettyPicture-ADThumbnail.jpg NewFileSize : 8,9111328125 NewFileWidth : 336 NewFileHeight : 252 ThumbnailByteArray : {255, 216, 255, 224…}


To actually write the “ThumbnailByteArray” to the user object you do something like this:


# Set the folder paths
$PictureFilePath = '.\Path\MyPrettyPicture.jpg'
$ADThumbnailPictureFolder = '.\TheFolderISave\ADThumbnails'

# Load the byte array
$UserPicture = [byte[]] $(ConvertTo-ADThumbnail -PictureFile $PictureFilePath -OutputDir $ADThumbnailPictureFolder | select -ExpandProperty ThumbnailByteArray)

# Write it to Active Directory
Set-ADUser -Identity 'MySamAccountName' -Replace @{ thumbnailPhoto = $UserPicture }

The cmdlet handles most picture formats, and shrinks them until they are small enough. You can set the file size, output folder path etc. with parameters.

I have tested the code on 1000+ pictures, so far so good 🙂

If you missed the link above, the code is available here.

Creating Master Lists for Quests Lotus Notes to Exchange tool

During our migration to Office 365, we ran into an issue with creating Master Lists for the migration tool. The tool just creates one huge file with all of the users in it, but we want to migrate them based on different things like mailbox size, where in the organisation they are and so on.

When we have the users we want to migrate in a list, we need to split that list up for scaleability reasons (multiple migration tool servers), and since the files need to be formatted in a quite specific way, this was becoming a pain…

What better way to fix this problem than with a PowerShell form?

I opened up Sapien PowerShell Studio 2012 and started working. Here are the results:
CreateMasterLists

Just browse for the master tsv file, the columns found in the file will be automatically populated in the droplist. Choose which one you want to do the matching on (in our case targetaddress, same as e-mail/UPN):

ChoosingKey


Select the other settings, should be pretty obvious:

OtherSettings


And hit “Build file(s)”, and watch it go:

finding_users


If you just want to split the master file, that’s possible aswell, just tick that box and hit the Build-button:

splitting_into_files


I hope someone else might have use of this little form!

The code is available here and it requires at least PowerShell v3 to run properly.