Tag Archives: Web scraping

Web scraping with PowerShell (Getting a package trace from a postal service)

Building an advanced function that can consume information on the web is pretty powerfull and I use it for all kinds of things.

In this post I will try to guide you through the process on how to build one for more or less any service, but the example will be the Swedish postal service.

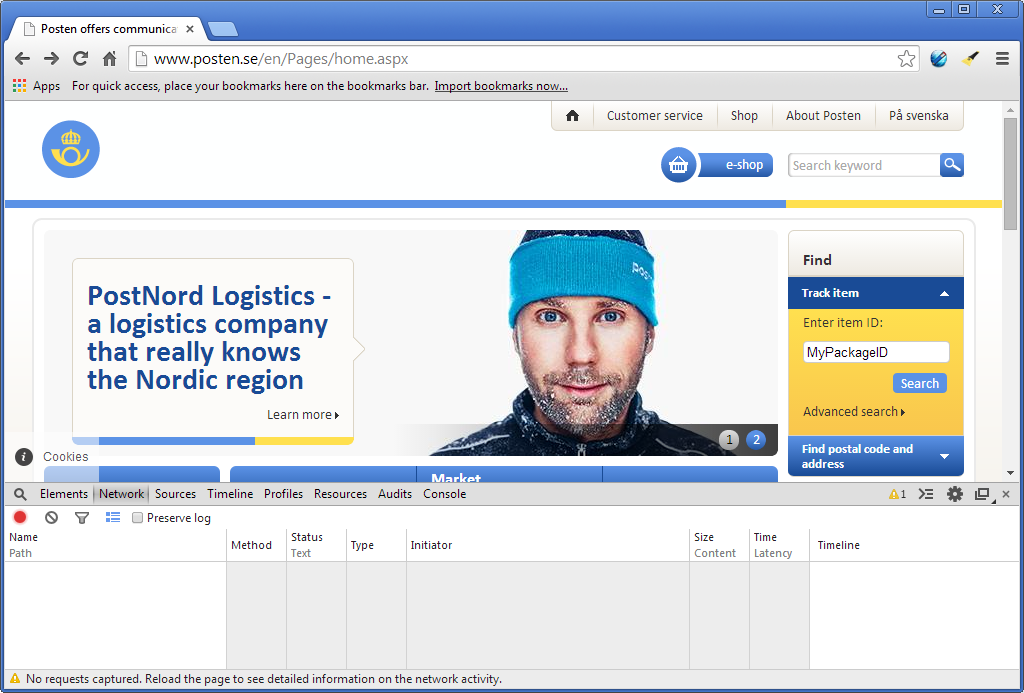
I usually start with a web browser that has some developer features, for example Google Chrome. Go to the website and press Ctrl+Shift+i, select the “network tab” and enter whatever information you need to send to the service, in this case the ID of the package I want to trace.

In this example it should look like this: (I have chosen to use the English version of the website):
ChromeCtrlAltI

Press the submit button and look at the beginning of the network trace. You usually find a GET or POST request there, in this case it is a GET-request.
In this example it looks like this:
ChromePackageTrace

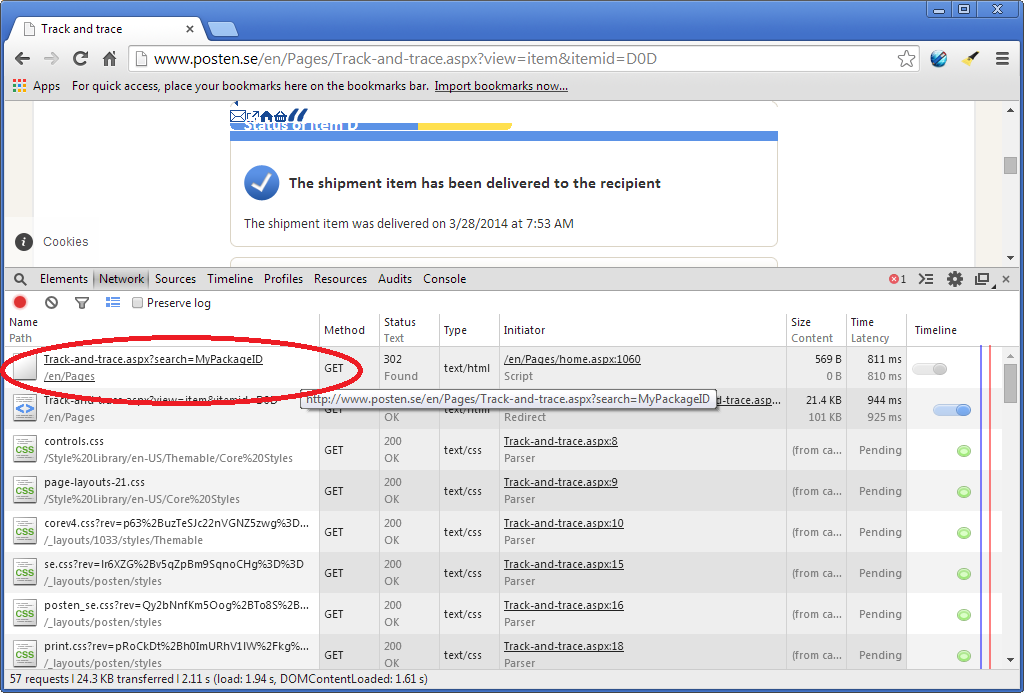
You can right click that row and select “Copy link address”, which in this case is “http://www.posten.se/en/Pages/Track-and-trace.aspx?search=MyPackageID”.

Now open whatever PowerShell script environment you prefer, for example the PowerShell ISE. Start with sending the same request from PowerShell, that can be done by using Invoke-WebRequest (if you are using PowerShell v3 or higher). Start with putting a variable where “MyPackageId” is.

For example:

$Id = "MyPackageId"
$PackageTrace = Invoke-WebRequest -Uri "http://www.posten.se/en/Pages/Track-and-trace.aspx?search=$Id" -UseBasicParsing

The “UseBasicParsing” switch is not mandatory here, but if you don’t need the html returned to be parsed into different objects it is a bit quicker.

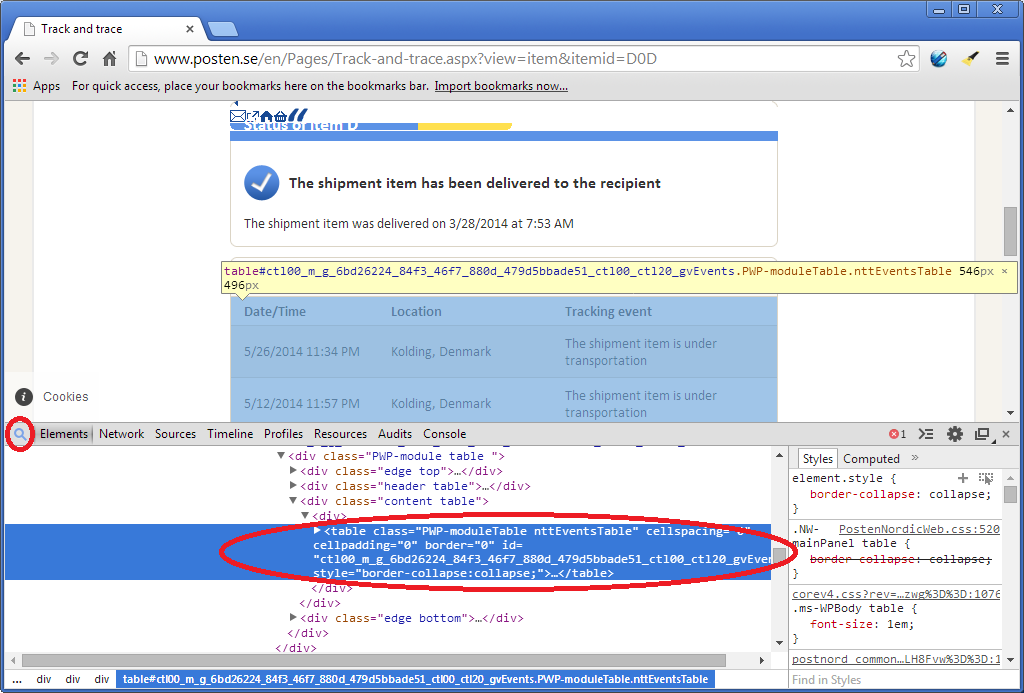
We now need to parse the html-code stored in the “Content”-property to get what we want. This can be a bit time consuming, but with a little help from Chrome it gets easier.

Press the magnifier button and hover the mouse over parts of the site or parts of the HTML-code (if you select the “Elements-tab”) and you will soon find what part of the HTML code you need.

In this example the table-tag. Screenshot:
FindWhatYouNeed

Now we need to do some string manipulation to get the parts we need properly formatted. In this case we want to split the HTML to get the parts between the start of the table and the end of it. What we have left is the rows with all the package events, find something that splits them up in to nice pieces, in this case the “tr class=” tag. The first of the rows that gets returned are some table information (containing a unique ID that might change) and the table columns, so we want to skip those. A oneliner that does all of this looks like:

$TraceItems = ((($PackageTrace.Content -split "<table class=`"PWP-moduleTable nttEventsTable`"")&#91;1&#93; -split "</TABLE>")[0]) -split "<tr class=" | Select-Object -Skip 2</code>

We can now loop through these items, parse them and build an object out of them. Each one of these items has three columns; a date, a location and a comment/tracking event. The columns are enclosed in the “TD”-tags so we can split them up at those.

When you have all the values we need we create the object and send it to the pipeline. Could look something like this:

foreach ($TraceItem in $TraceItems) {

    $EventDate = (($TraceItem -split "<td>")[1] -split "</td>")[0]
    $Location = (($TraceItem -split "<td>")[2] -split "</td>")[0]
    $Comment = (($TraceItem -split "<td>")[3] -split "</td>")[0]
    $PackageId = $Id

    $returnObject = New-Object System.Object
    $returnObject | Add-Member -Type NoteProperty -Name EventDate -Value $EventDate
    $returnObject | Add-Member -Type NoteProperty -Name Location -Value $Location
    $returnObject | Add-Member -Type NoteProperty -Name Comment -Value $Comment
    $returnObject | Add-Member -Type NoteProperty -Name Id -Value $PackageId

    Write-Output $returnObject
}

We now have “objectified” a website and made it useful in PowerShell! When we have come this far it’s a good idea to create an advanced function around it to make it really useful.

There are many good posts explaining how that is done, for example this one by Don Jones, so please refer to that if you need some help on getting started.

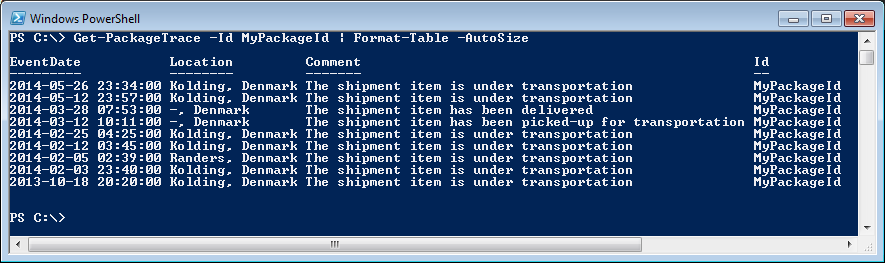
I have made a quick example of an advanced function out of the code written in this post which is available here.

This is how the function looks in PowerShell (MyPackageId actually seems to be a valid Id, but it looks a bit weird. The output in PowerShell matches the site though):
Get-PackageTrace-dump

Good luck automating anything!

And if you want to learn more, checkout my webscrape guide in this post!

Wake me up, when traffic calms down… (Home Automation)

Why do home automation with PowerShell?

There are certainly other solutions out there which are great, even excellent. For me personally, it’s mainly because it’s fun to be able to build parts of it by yourself, you learn a lot by doing it, but you can also base your tasks on almost any piece of information out there.

I’ll give you an example!

I’ve started to go to work after the traffic calms down in the morning, I have a pretty good idea of when this usually happens, but sometimes there is no traffic jams at all, and sometimes it’s completely hopeless.

Wouldn’t it be nice to be able to utilize live traffic information on the internet, and based on that trigger your wake up call? At least I thought so 🙂

First of all, try to find a provider for traffic information near you, and make sure you don’t break their ToS by fetching that information in a automatic way (ie. web scraping).

I won’t go into detail on how to build a webscrape-cmdlet right now, but I’ll show you how to use it when it’s done. (A guide to web scraping available here, here and here.)

This is the script I run every morning, I think the code comments will be enough to explain how it works:

# Import the Telldus module
Import-Module '.\Telldus.psm1'

# Import the Module containing your traffic parser
Import-Module '.\WebDataModule.psm1'

# Set your home and work address
$HomeAddress="Homeroad 1, MyTown"
$WorkAddress="Workaround 1, WorkTown"

# Set a max traveltime limit (in this case, in minutes)
[int] $TravelTimeLimit = 30

# I want it to be under this value for $NumberOfTimes consecutive times
[int] $NumberOfTimes = 3

# Make sure it does'nt get $True on first run
[int] $CurrentTravelTime = $TravelTimeLimit+1

# Reset variable to zero
[int] $NumberOfTimesVerifiedOK = 0

# Run until the traveltime limit has been passed enough times
while ($NumberOfTimesVerifiedOK -lt $NumberOfTimes) {
    
    # Reset variable
    $CurrentTravelTime = $null

    # Load new data, the "Get-Traffic"-cmdlet is my traffic parser
    [int] $CurrentTravelTime = Get-Traffic -FromAddress $HomeAddress -ToAddress $WorkAddress | select -ExpandProperty TravelTime

    # Check if it is below your traveltime limit, and that it is not $null (cmdlet failed)
    # Increase $NumberOfTimesVerifiedOK if it was ok, or reset to zero if it wasn't
    if ($CurrentTravelTime -ne $null -AND $CurrentTravelTime -lt $TravelTimeLimit) {
        $NumberOfTimesVerifiedOK++
    }
    else {
        $NumberOfTimesVerifiedOK = 0
    }

    # Write current status
    Write-Output "Traffic has been verified as OK $NumberOfTimesVerifiedOK consecutive times"

    # Pause for a while before checking again, 10 minutes or so...
    Start-Sleep -Seconds 600
}

# The while loop will exit when traveltime has been verified enough times.

# Write status
Write-Output "Initiating sunrise, current travel time to $WorkAddress is $CurrentTravelTime minutes, and has been below $TravelTimeLimit for $NumberOfTimes consecutive times."

# Time to initiate the "sunrise effect"

# Set the device id for the lamp you want to light up
$BedroomLampDeviceID="123456"

# Set start dimlevel
$SunriseDimlevel = 1

# Set how much it should increase everytime we "raise" it
$SunriseSteps = 5

# Set your Telldus credentials
$Username="[email protected]"
$Password="MySecretPassword"

# Kick off the "sunrise-loop"
while ($SunriseDimlevel -lt 255) {
    # Write some status
    Write-Output "Setting dimlevel to $SunriseDimlevel"

    # Set the new dimlevel
    Set-TDDimmer -Username $Username -Password $Password -DeviceID $BedroomLampDeviceID -Level $SunriseDimlevel

    # Sleep for a while (30 seconds makes the "sunrise" ~30 minutes long depending on your $SunriseSteps value)
    Start-Sleep -Seconds 30

    # Set the next dimlevel
    $SunriseDimlevel=$SunriseDimlevel+$SunriseSteps
}

# Set the lamp to full power (loop has exited) and exit
Set-TDDimmer -Username $Username -Password $Password -DeviceID $BedroomLampDeviceID -Level 255
Write-Output "Maximum level is set."

This script is scheduled to run in the morning (on week days) around the earliest time I want to go up, the first loop will run until traffic calms down, and then start the “sunrise”-loop which will run until the light reaches its maximum level (255).

You could of course turn on other stuff as well, like a coffee brewer (make sure you don’t do this while you are away…), a radio, play some music or something else.

That is one of the (many!) pro’s of doing things with PowerShell! 🙂