Since I’ve gotten some positive feedback regarding the web scrape related posts on this blog, I thought I should write a guide on how to build PowerShell functions that interacts with a website. To make it a bit more fun, I thought it should be about ordering pizza!
The site in question is a Swedish site called OnlinePizza.
Since the actual code won’t be used for anything serious, you will see a few shortcuts here and there, the goal is to give you an idea on how to do something similar, not to create the perfect pizza automation module. In fact, we’ll only create a few functions, one for logging in, one for checking our account information and one for listing restaurants. Hopefully, the process and steps we will go through when creating these functions will teach you the basics of web scraping. To create a whole module that can handle the complete process of ordering pizzas seems a bit overkill, but feel free to keep working on it if you want to 🙂
So with no further ado, let’s get to it…
Figuring out how the site works and logging in
The first thing we need to do is figuring out how to log in. The easiest way to do this is to open a web browser with some developer features, since I’ve used Chrome before I thought I could use Internet Explorer in this example.
Begin with locating the loginpage for the site, which in this example is: http://onlinepizza.se/loggain as shown below:
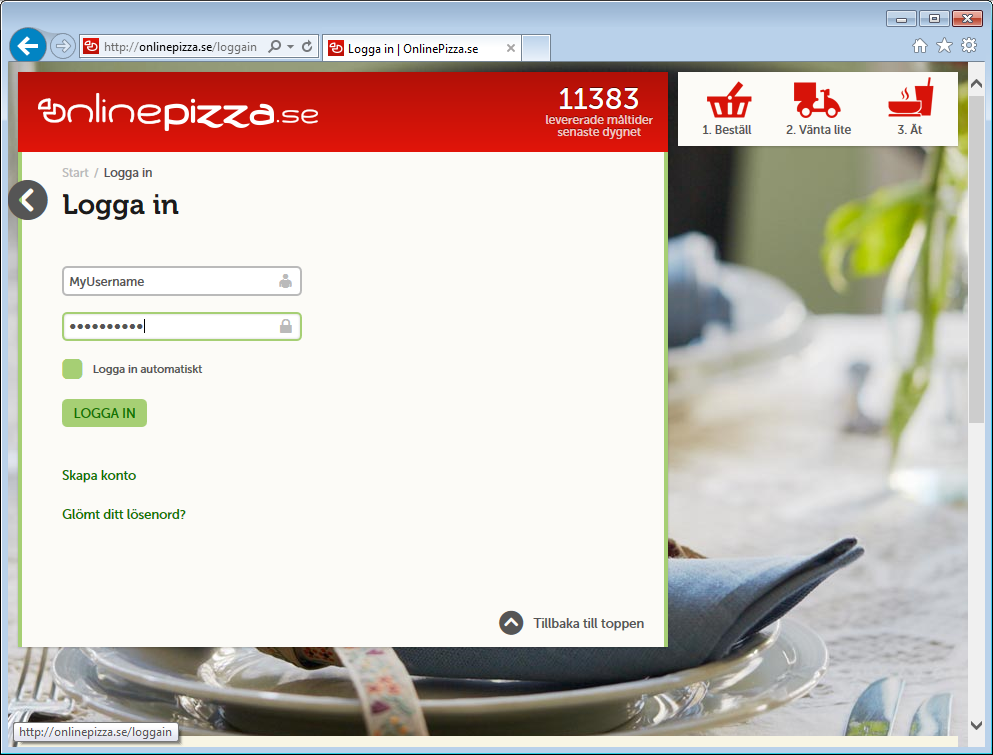
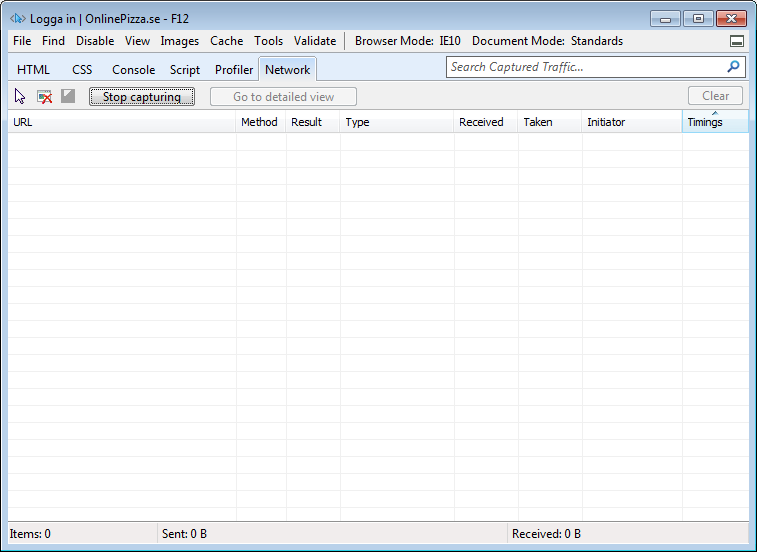
After you’ve browsed to that page and filled in your username/password, you press F12 (Ctrl+Shift+i if you’re using Chrome) and select the “Network”-tab and press the “Start capturing”-button.
Should look something like this if using IE:
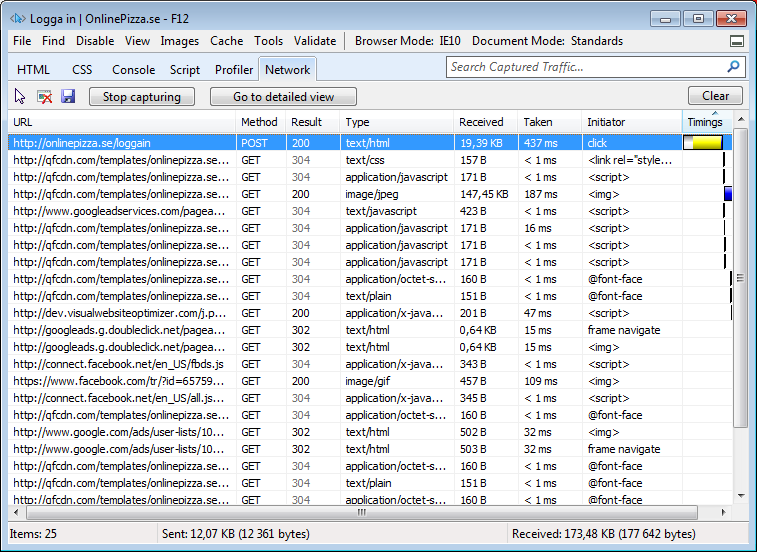
Go back to the site and press the “login” button (“Logga in” in Swedish), and when it’s done, go back to the “network”-tab again and check the first request which is usually a Get or a Post request, in this case a Post-request:
Double click on the first row and select the “Request body”-tab. This is how the webrequest looked when it got sent to the webserver, so this is what we need to mimic from PowerShell:
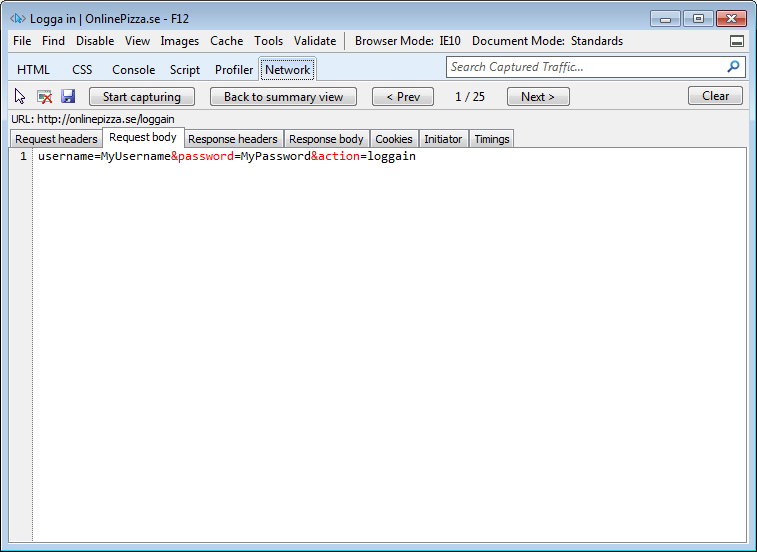
This can be done in different ways, you could either basically download the site, try to manipulate the fields and then post the form, or create a hashtable with the required keys (username, password and action) and send that. The later is quickest since it only needs one request, so that’s what we’ll do here (this might not always work though).
To create the hashtable you can do this:
$Request = @{'username' = 'MyUsername'
             'password'= 'MyPassword'
             'action'= 'loggain'}
We now need to send it to the web server. The easiest way to do this is usually to use the “Invoke-WebRequest”-cmdlet that came with PowerShell v3, so that’s what we’ll do here. There are a few scenarios where this will give you issues, as is the case with this site, so we’ll need to use a workaround. When trying to download the site with the “Invoke-WebRequest”-cmdlet it will give you the error: “Invoke-WebRequest : ‘”UTF-8″‘ is not a supported encoding name.”
This leaves you two options as far as I know, you either skip the “Invoke-WebRequest”-cmdlet altogether and use the .Net WebClient Class instead, or you can fix this error by sending the output of the cmdlet to a file instead of the pipeline. We’ll do the latter here and save the .Net-method for another post.
Note: As stated above, this is mostly to give you and idea on how to create a “web scraping function” in PowerShell so we’ll do a few shortcuts. If this was a to become a serious module that would later be used in production, make sure the output-file is written to a place where the user will have write access and that it has a name that won’t damage (overwrite) anything.
The command itself is pretty simple, it looks like this:
Invoke-WebRequest -Uri "https://onlinepizza.se/loggain" -Method Post -Body $Request -SessionVariable Global:OnlinePizzaSession -OutFile .\dump.htm
I’ll break it down a bit so you’ll know what each parameter does:
- Uri – This specifies where to send the request. This should be the URL you saw in the screenshot of the “Request body” above, this can differ from the actual loginpage depending on the site.
- Method – This should match the method you saw in the loginrequest, in this case it was a “Post”-request.
- Body – This is what the request will actually contain, in our case the hashtable we created.
- SessionVariable – The variable we specify here (no leading $!) will contain cookies and other data needed to keep the session consistent through the rest of the commands we will run (this will for example keep us logged in). I’ve specified it in the “Global” scope since we want to use it together with other functions later on, and to make that work, it can’t be in the functions scope (since that will be gone before the next function will execute).
- OutFile – Our workaround. Specify a file where the output from the command (the html of the site) should be saved.
Alright, so the request is sent and we should now be logged in, you can verify this by looking in the “dump.htm”-file, it will usually contain a “You have been logged in!”-message of some sort. In this case that message is in Swedish though.
So, we have figured out how to log in, we now need to wrap a function around this, which will be our next step in this process!
Creating the function
To create this function we need to ask for a parameter, the only one we need in this case is the credential, which should be of the type PSCredential.
The code for defining the function name and the parameter looks like this:
function Connect-OnlinePizza
{
    [cmdletbinding()]
    param(
          [Parameter(Mandatory=$True)]
          [System.Management.Automation.PSCredential] $Credential)
As you can see, we also add the almost magical “cmdletbinding”-keyword aswell to get all the wonderful features that gives us. We also state the Credential-parameter as mandatory, and we define its data type, which will make the function ask for the credential in the same way as “Get-Credential” works if the user didn’t specify any.
We now need to place the credential in our request, which we can do this way:
$Username = $Credential.UserName
$Password = $Credential.GetNetworkCredential().Password

$Request = @{'username' = $Username
             'password'= $Password
             'action'= 'loggain'}
We then add our “Invoke-WebRequest”-command again:
Invoke-WebRequest -Uri "https://onlinepizza.se/loggain" -Method Post -Body $Request -SessionVariable Global:OnlinePizzaSession -OutFile .\dump.htm
And we should be logged in. When building something like this we should make sure though. This can easily be done by looking for that “You have been logged in!”-text in the dump.htm-file, for example with the “Select-String”-cmdlet.
And while we’re at it, why not delete the dump.htm-file to clean up a bit. That would look like:
$LoggedIn = Select-String -Path .\dump.htm -Pattern "inloggad som $Username" -Quiet

Remove-Item .\dump.htm -Force -Confirm:$false -ErrorAction SilentlyContinue

if ($LoggedIn) {
    Write-Verbose "You are now logged in!"
}
else {
    Write-Error "Login failed!"
}
And that’s it! When put together, the code looks like this:
function Connect-OnlinePizza
{
    [cmdletbinding()]
    param(
          [Parameter(Mandatory=$True)]
          [System.Management.Automation.PSCredential] $Credential)

    $Username = $Credential.UserName
    $Password = $Credential.GetNetworkCredential().Password

    $Request = @{'username' = $Username
                 'password'= $Password
                 'action'= 'loggain'}

    Invoke-WebRequest -Uri "https://onlinepizza.se/loggain" -Method Post -Body $Request -SessionVariable Global:OnlinePizzaSession -OutFile .\dump.htm

    $LoggedIn = Select-String -Path .\dump.htm -Pattern "inloggad som $Username" -Quiet

    Remove-Item .\dump.htm -Force -Confirm:$false -ErrorAction SilentlyContinue

    if ($LoggedIn) {
        Write-Verbose "You are now logged in!"
    }
    else {
        Write-Error "Login failed!"
    }
}
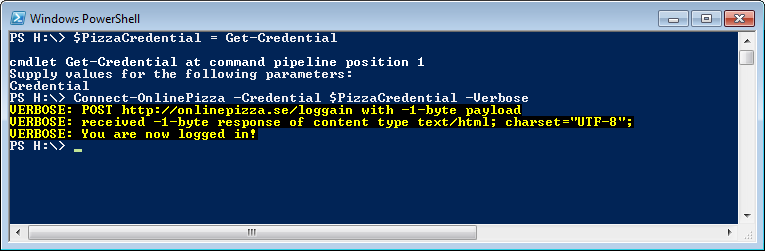
And this is how it looks in action:
That’s it for this post. In the next one, we’ll create the function for fetching our account information and one for getting a list of what restaurants are available in our location.
Hi! I hope this isn’t bringing up too old of a post, but how do you handle logging in when the request URL is “https://onlinepizza.se/ajax/user/login” instead (they changed the site)? I’ve tried doing the same type of thing, but none of it seems to be a valid request. If I make the request to that URL it seems like it’s not reachable, my best guess it that it’s some web dev black magic going on (read javascript) with the AJAX.
Hi!
Sorry for the delay in replying! It seems you’re right, the site has changed (and I noticed they put it behind Cloudflare which could potentially explain the issue you’re seeing as well) so this example isn’t working right now, sadly, this is the nature of web scraping, it can be quite fragile (and this post is quite old as you noted 🙂 ).
You are also right that Invoke-WebRequest doesn’t execute JavaScript, so that could also be the reason. If I can find the time to investigate this I’ll try to update you and this post with the result, but I hope you got the idea on how to use PowerShell for web scraping anyway 🙂
//Anders
Hi can you do the same analysis of the site http://www.elbyte.se